18 holes
PAR 71
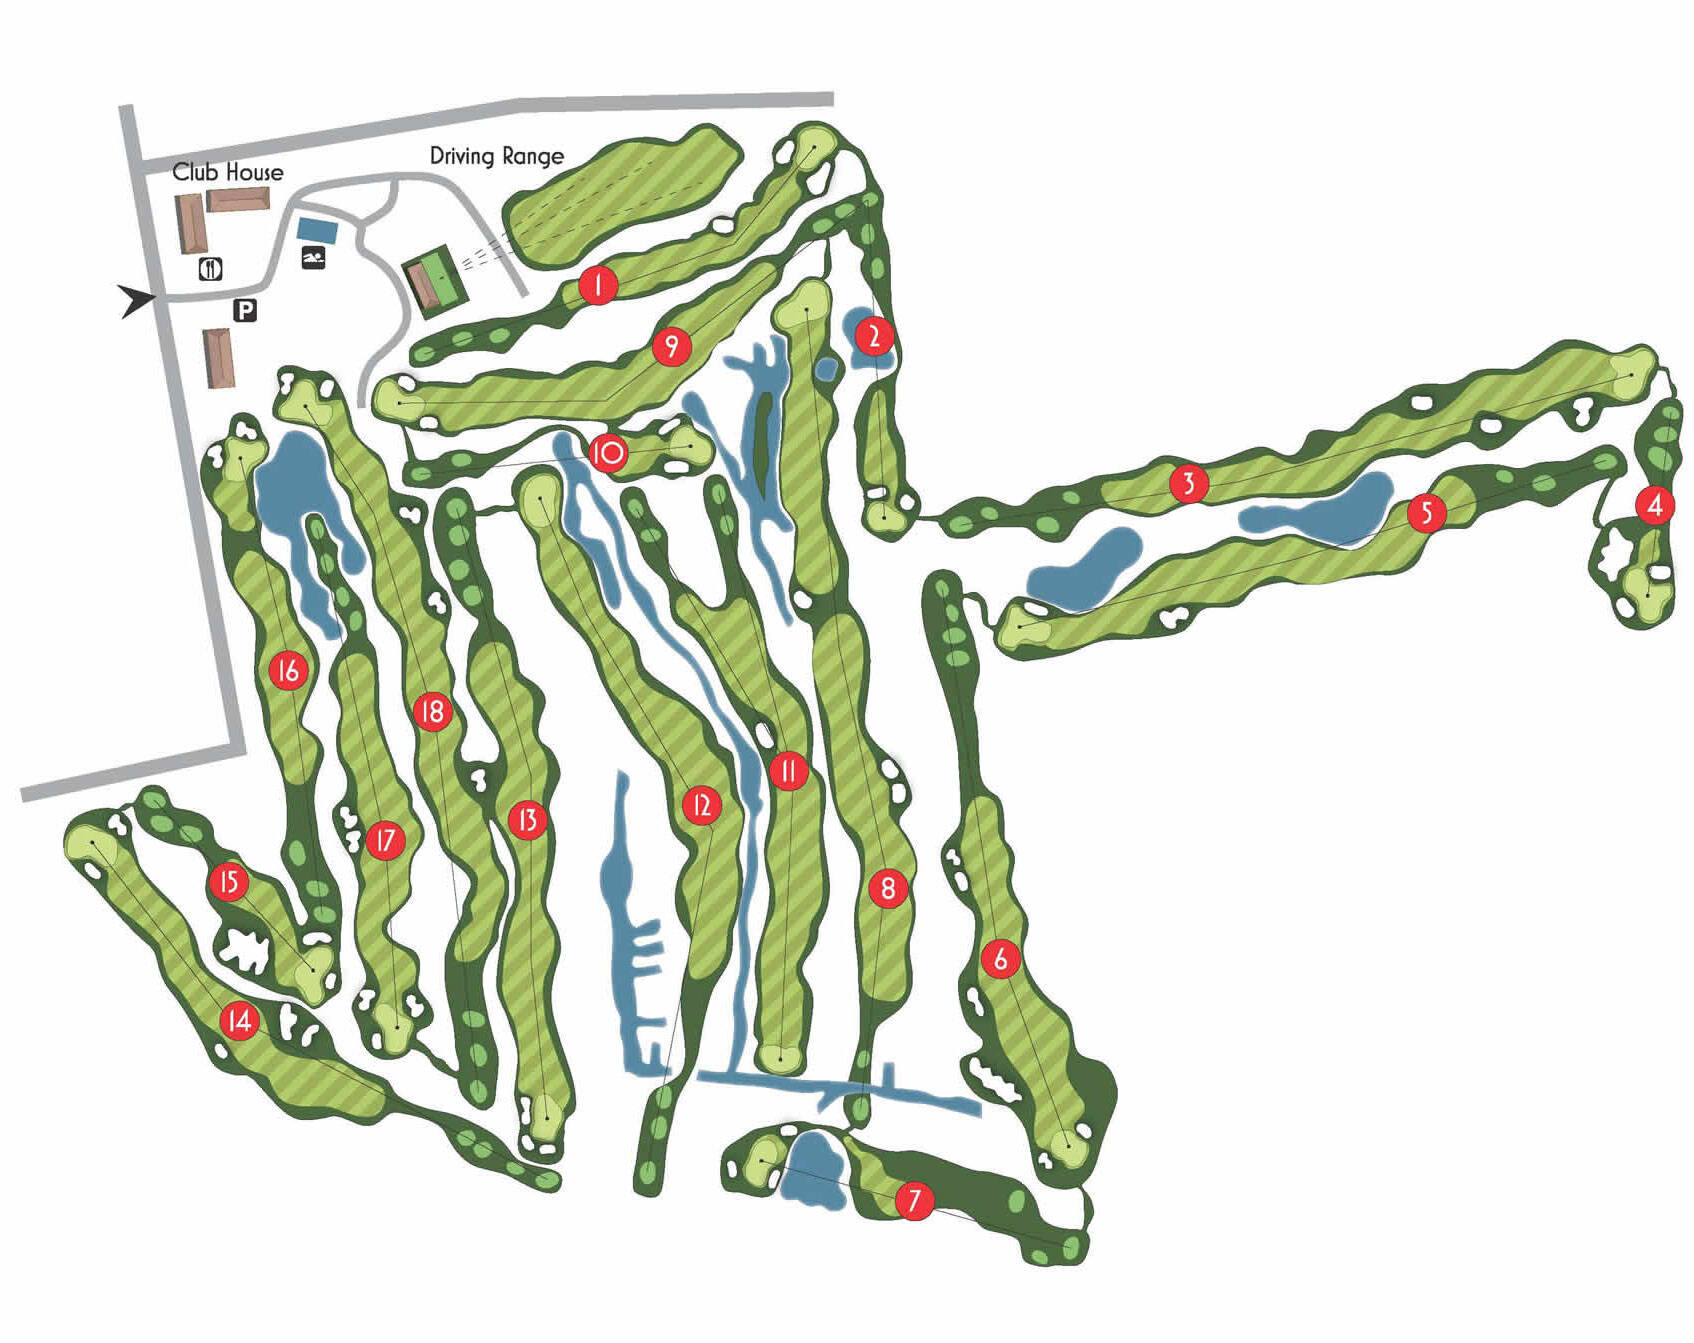
The path to 18 holes of the Vigevano Golf Club is spread over two different levels: the first 12 holes immersed in the woods of Ticino Park, among mature trees and spring water ponds, the last six holes are more American-style and cleverly designed. A dual layout allows for some elevated tees and a significantly uphill green, on notoriously flat terrain.
The difficulties have been intelligently distributed throughout the course, where the holes alternate, highlighting pleasantly different obstacles and aesthetic characteristics, for a challenging but stimulating game, full of unexpected surprises.
William Rosen – International Golf Master – defined the Vigevano Golf Club as “the faithful representation of a course built with the utmost respect for the environment with a layout that offers notable ideas for a varied, technically valid and at the same time fun game“.
All you have to do is challenge our field!
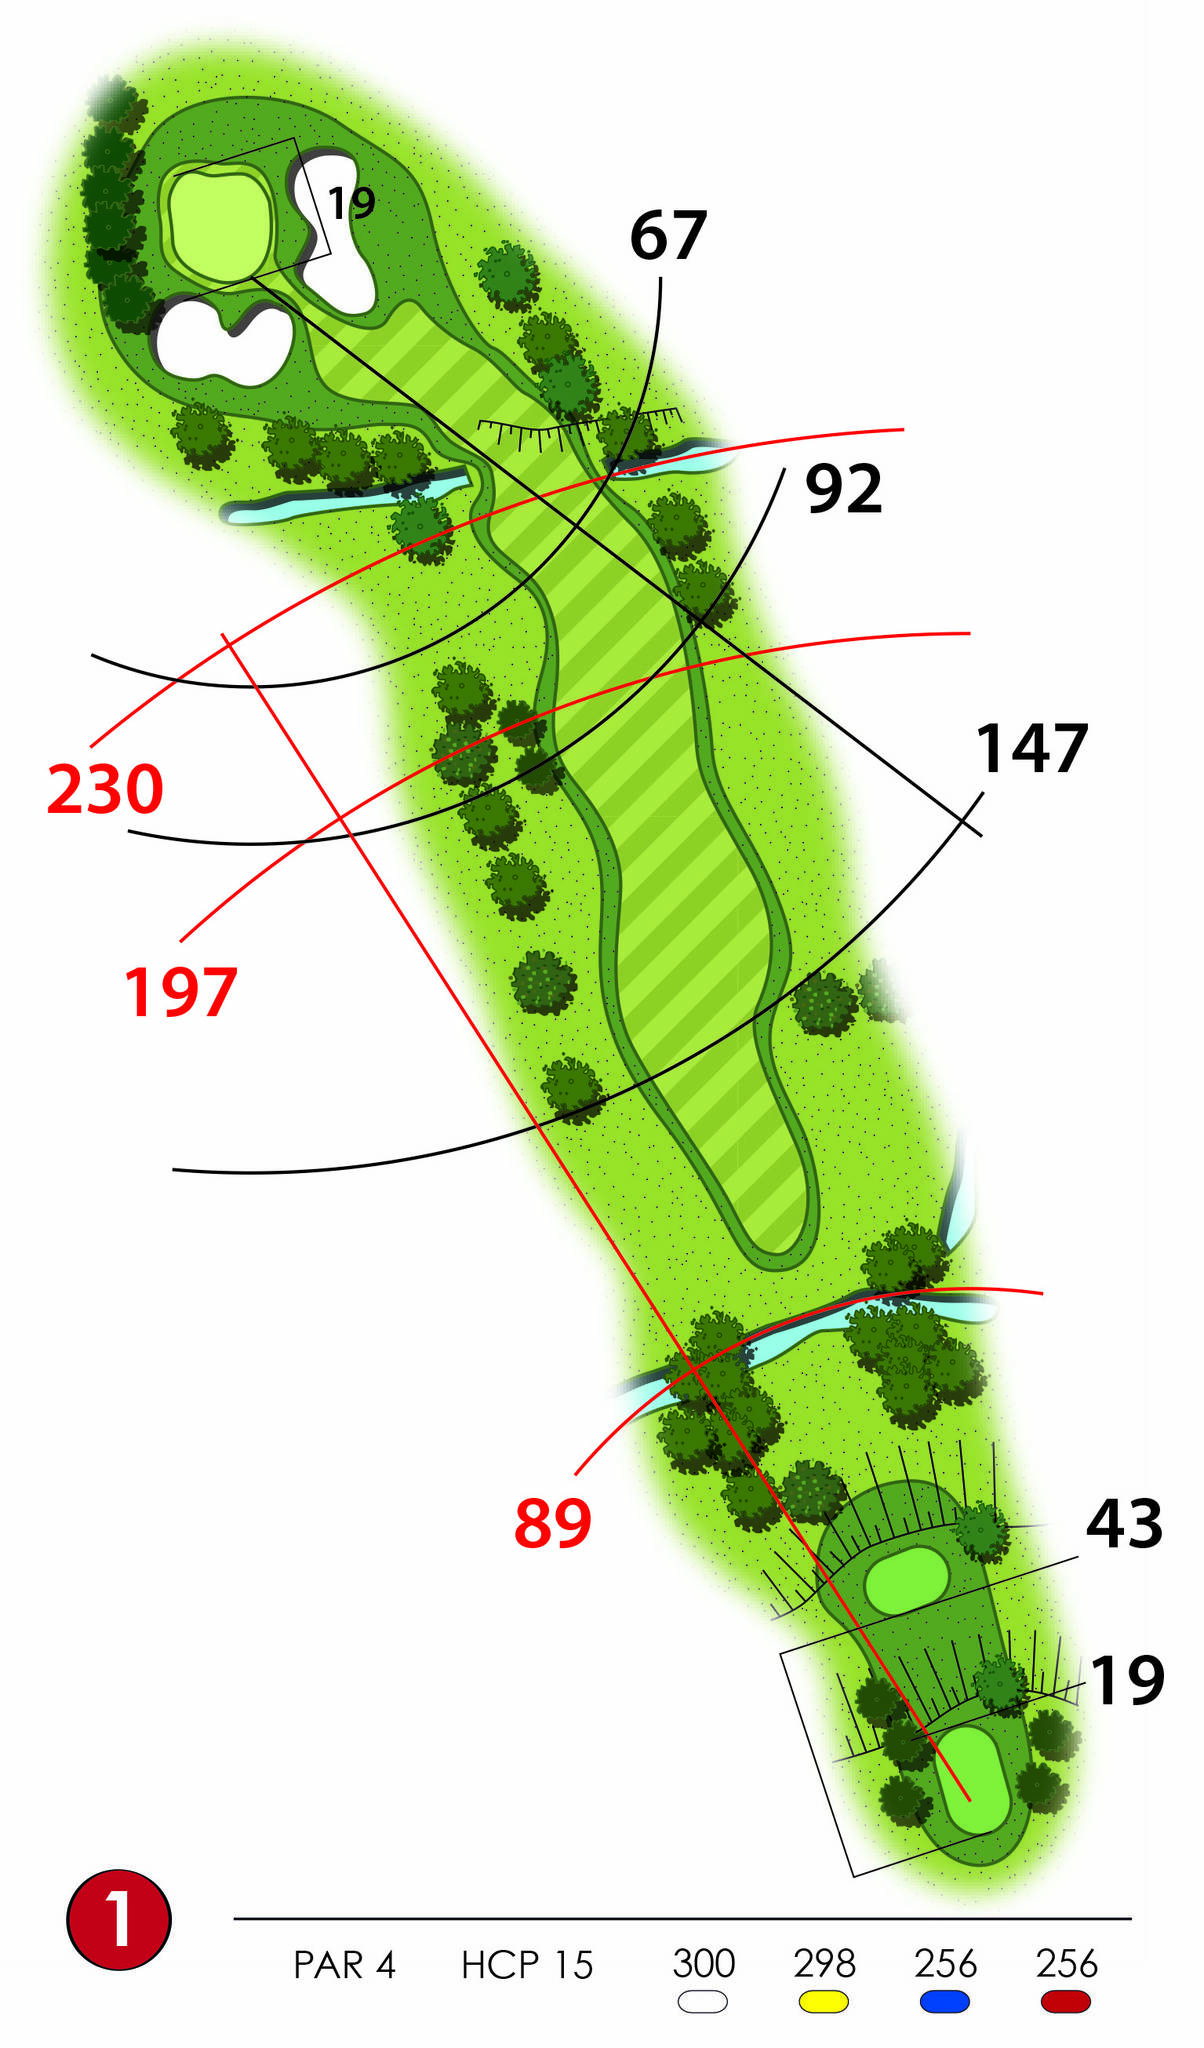
Hole 1
This opening hole features an elevated tee-off. The out-of-bounds on the left side and a ditch 230 meters to the right urge caution.
A 3-wood or even an iron still leaves a short shot (Pitch/8-iron) to a green without particular slopes and protected from the front by two bunkers.
The more “reckless” and powerful player can risk the shot to the green with the Drive for a greater chance of Birdie.
Hole 2
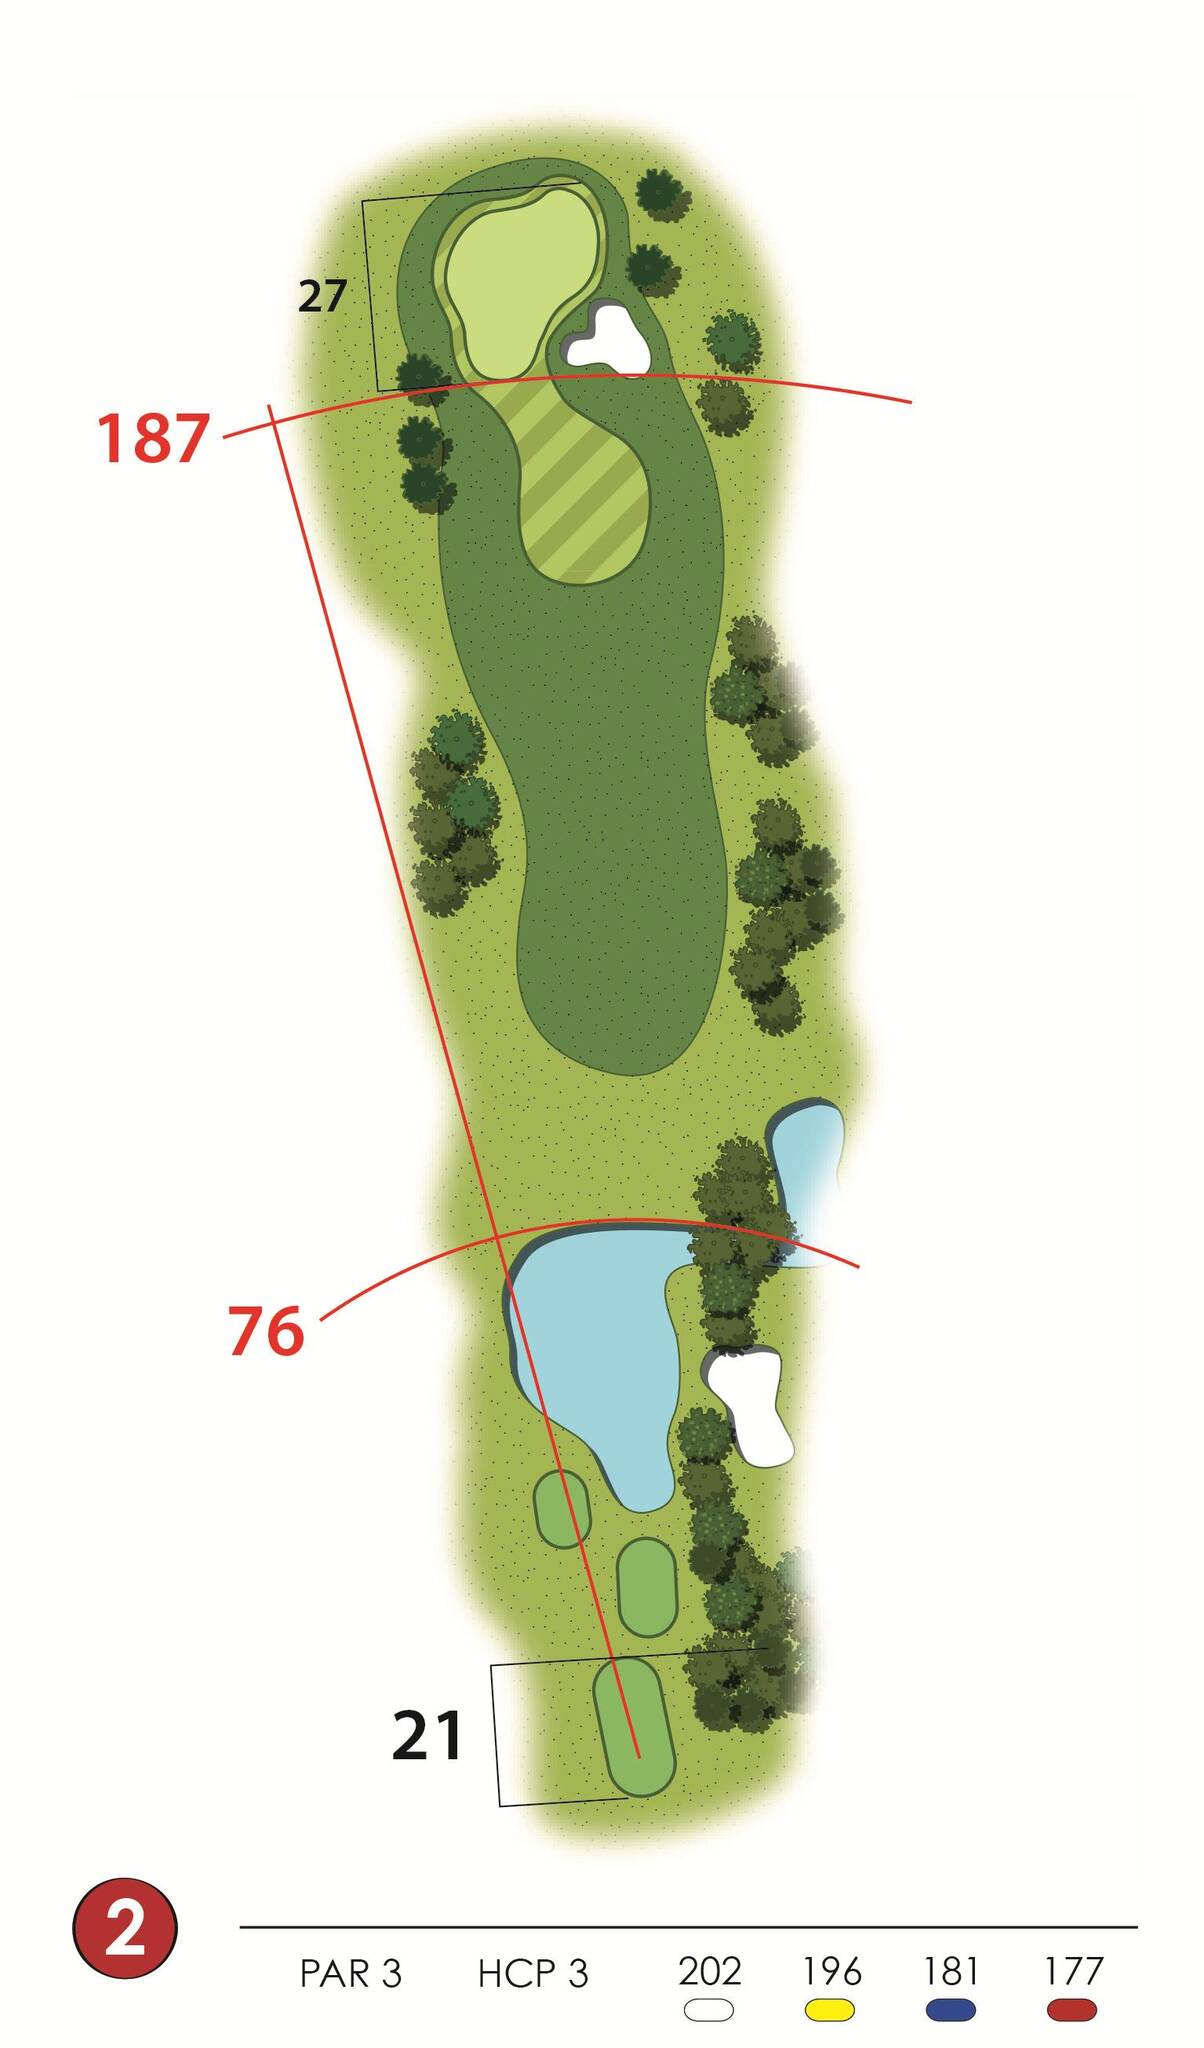
A decidedly long and challenging par 3. The green is difficult to access due to a bunker on the right side and vegetation on the left. The green, not large, is split into two levels and difficult to read.
A wood or long iron for the more powerful ones will help you reach the green. Leaving the hole with par, especially with the long flag on the right, is always a great result.
Hole 3
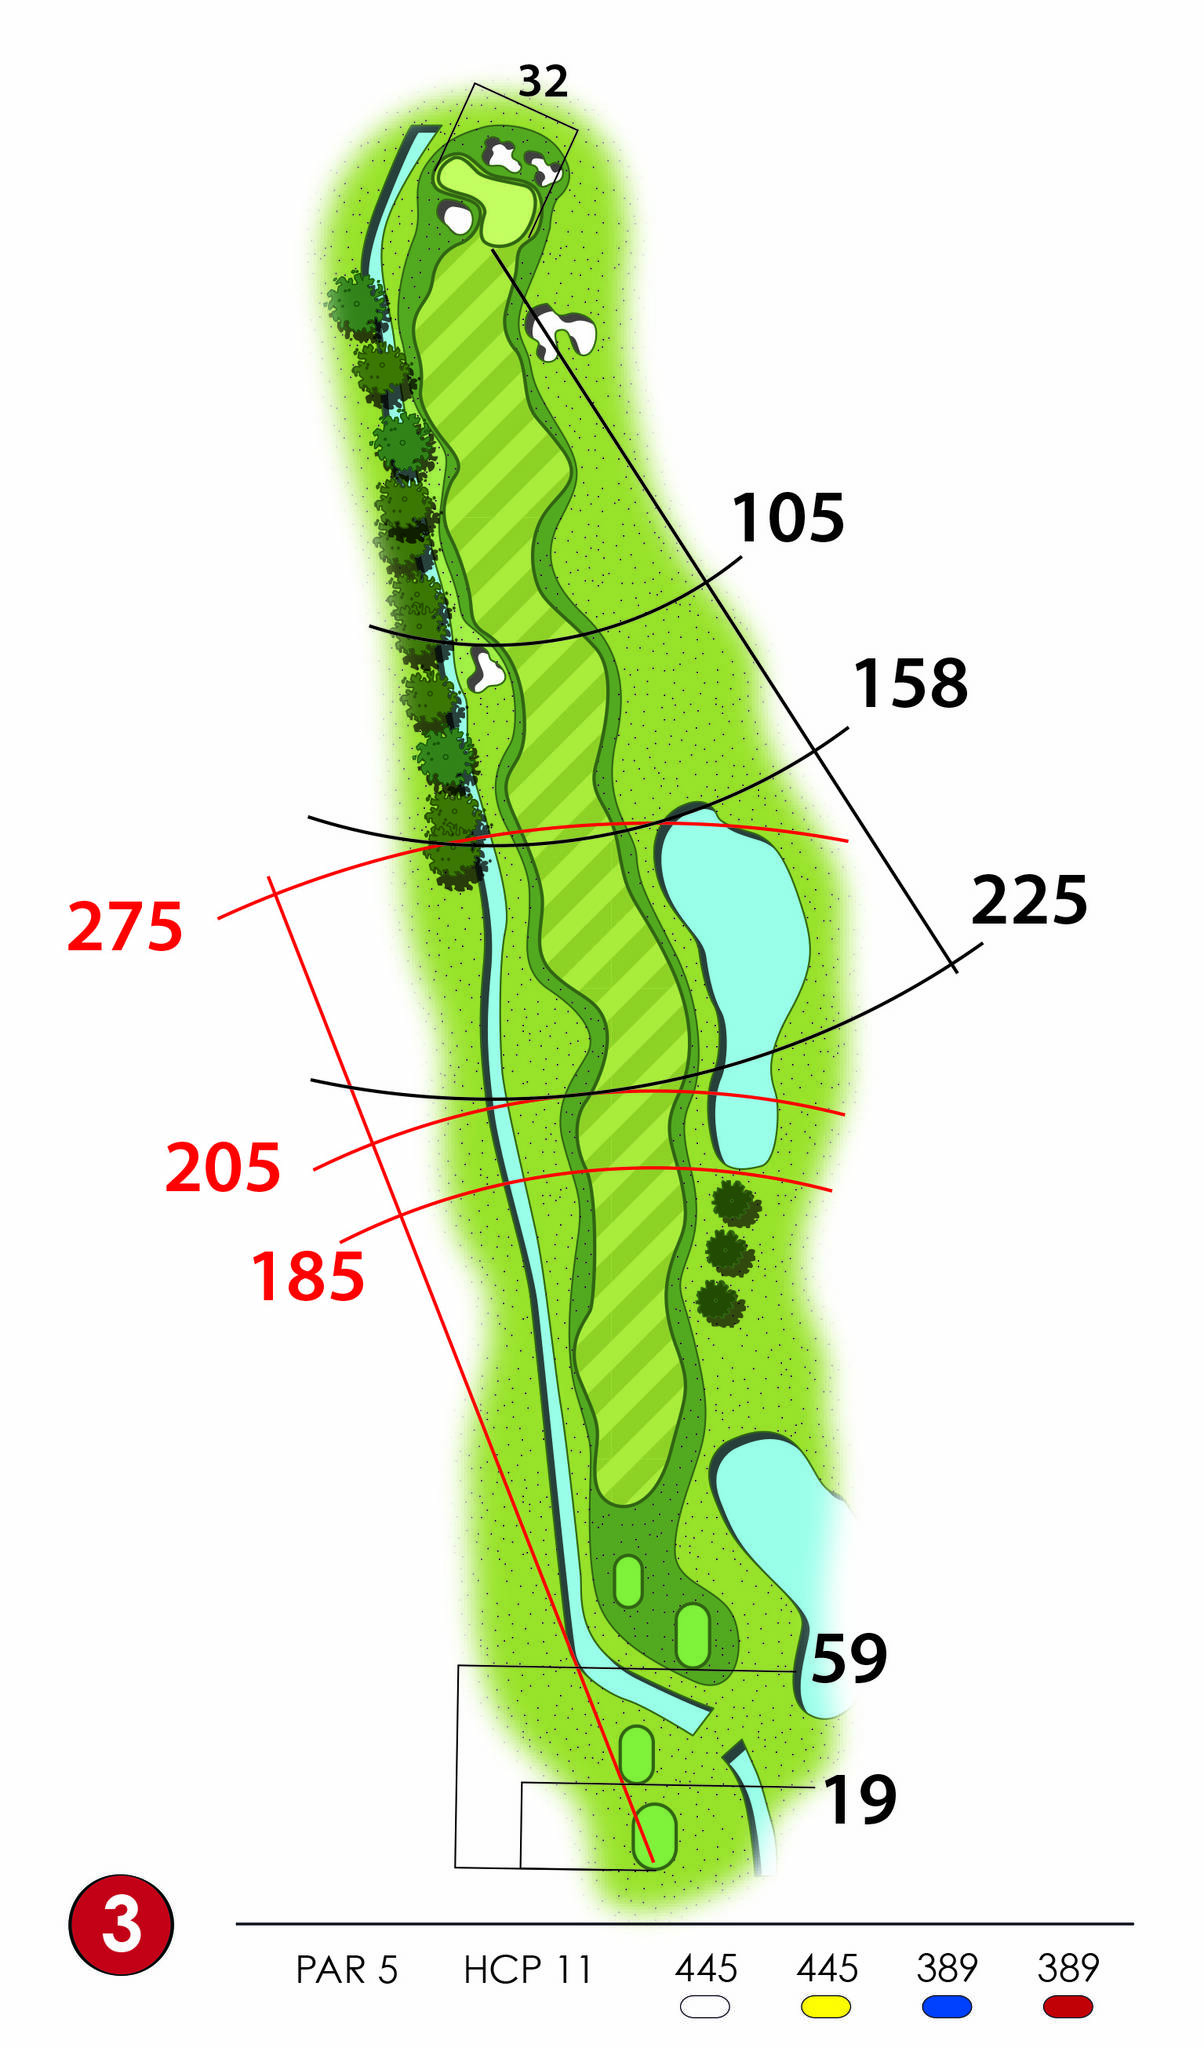
A decidedly short par 5 that might lead one to think of an easy birdie, but the course of the hole suggests maximum caution.
A lake on the right side about 220 yards from the tee and a water hazard along the entire left side encourage a cautious iron shot off the tee. The second shot (wood) offers more breathing room, although the presence of three bunkers on the fairway still requires precision. The green is wide at the front—which becomes significantly narrower at the back—and a central hump makes it difficult to hit a two-putt.
Hole 4
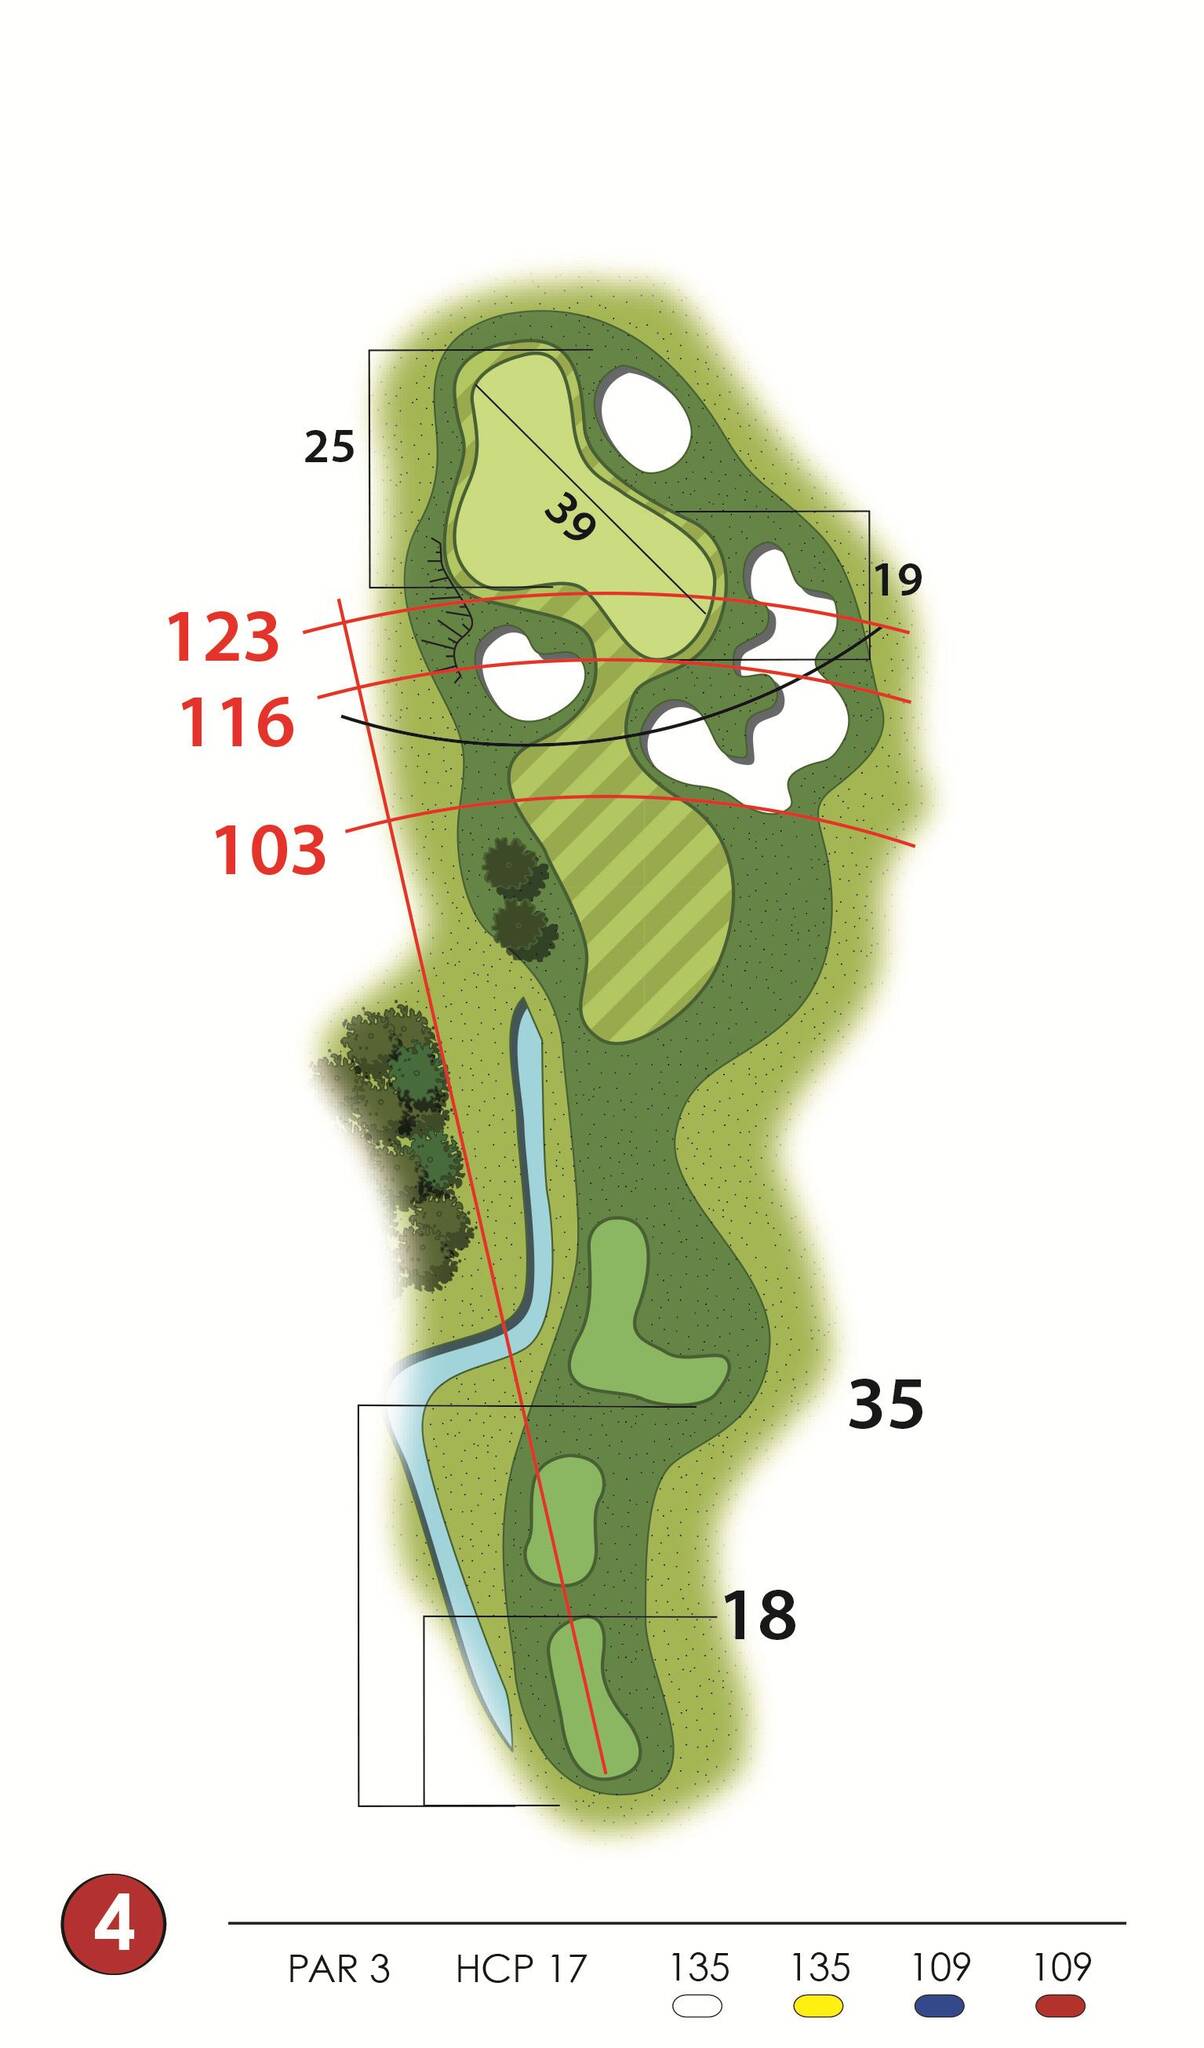
The shortest par 3 on the course and a good birdie opportunity.
The very large green but without significant slopes offers various possibilities for flag positions, which lead to playing from a short pitch to a 7-iron. The out of bounds on the back and the ditch that runs alongside the hole on the left side rarely come into play.
Hole 5
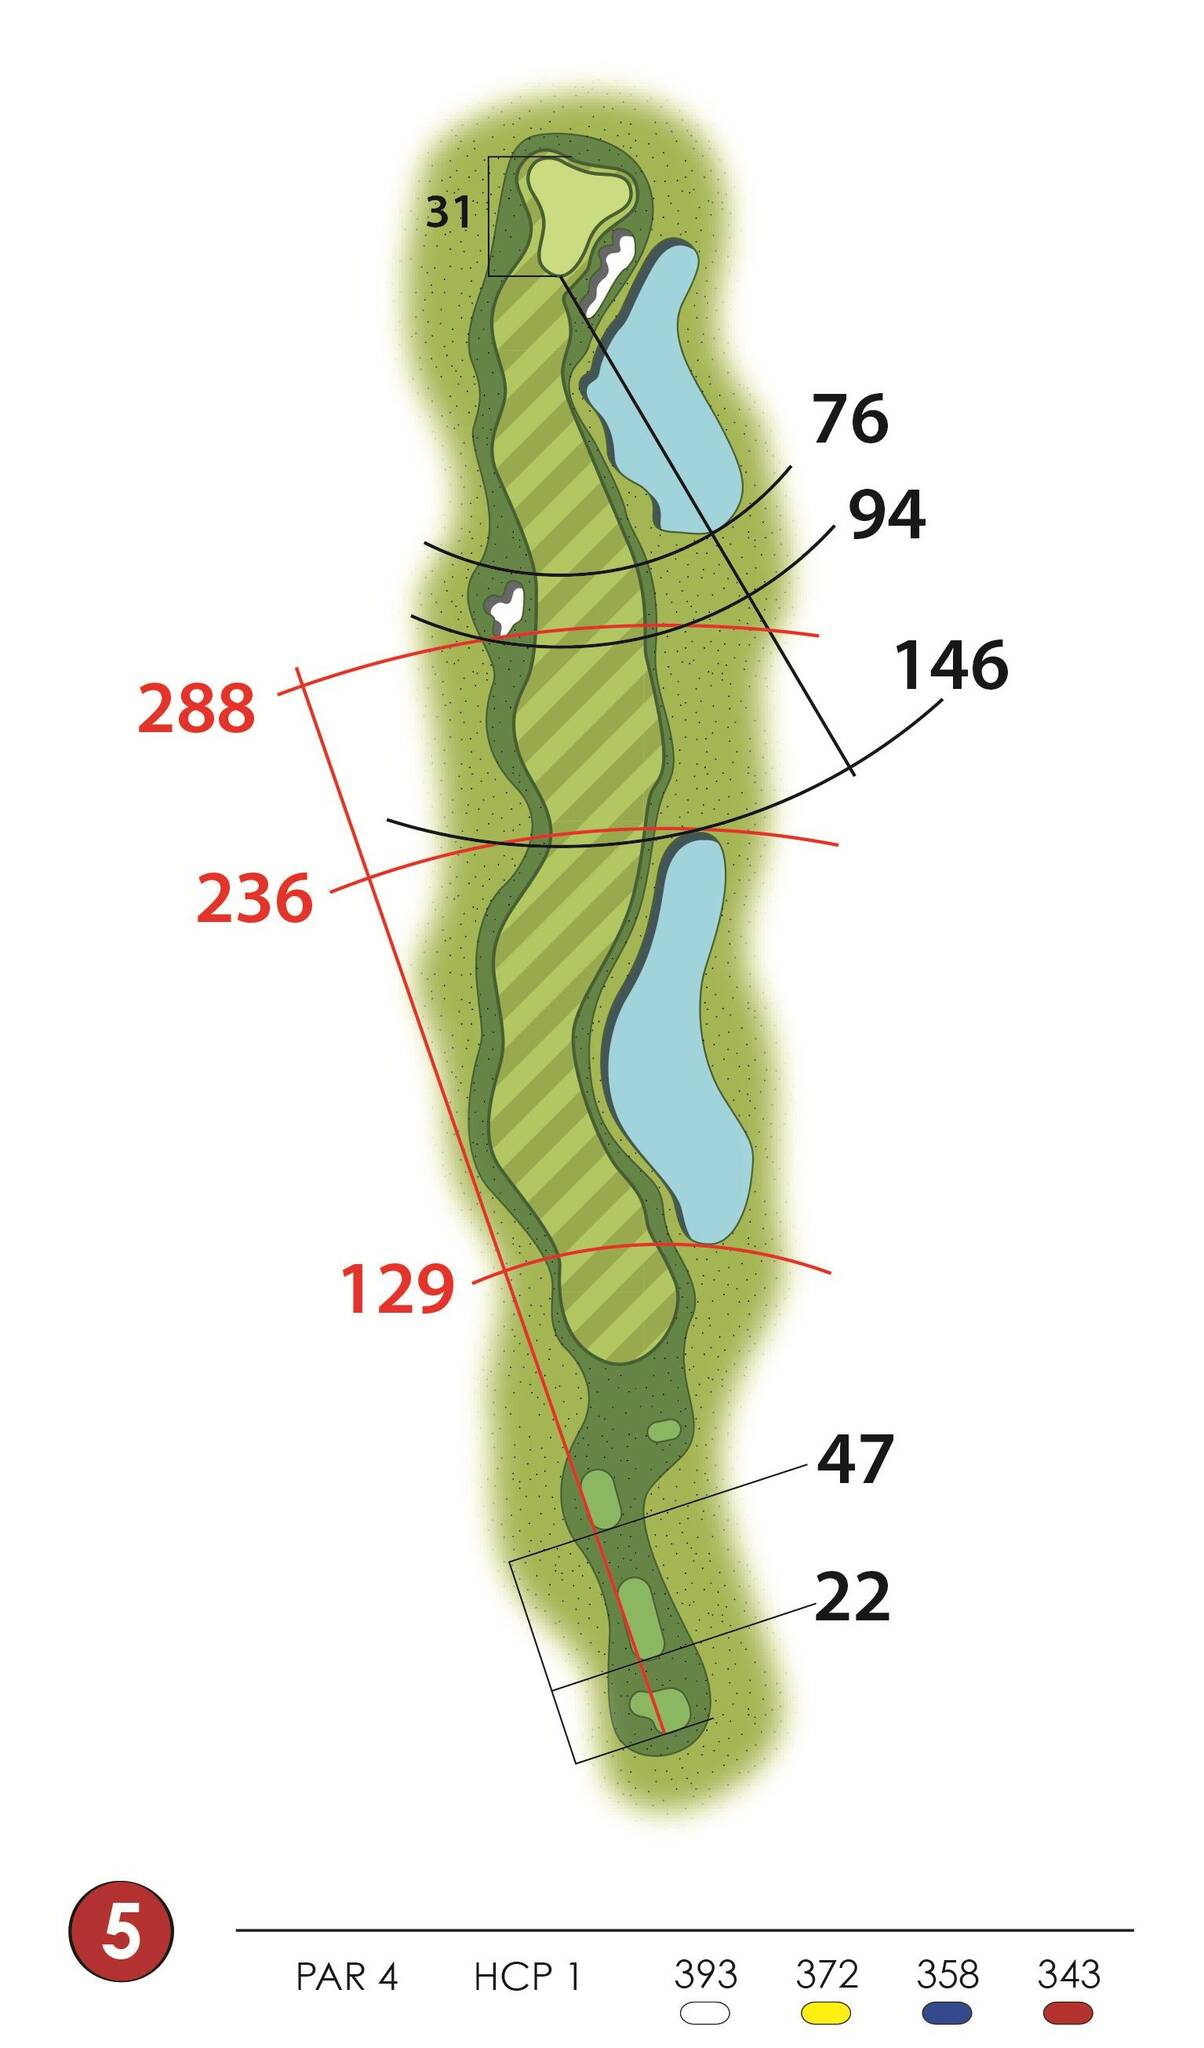
A beautiful and challenging hole. Its nearly 400 meters in length and the lake on the right side require a long and precise drive.
The second shot, usually played with a long iron or a wood for the less powerful, is aimed at a green protected on the right by a bunker and a second lake, but which also allows for a roll-through on the left side. The green is large and uphill, with treacherous slopes, especially on the right side.
Hole 6
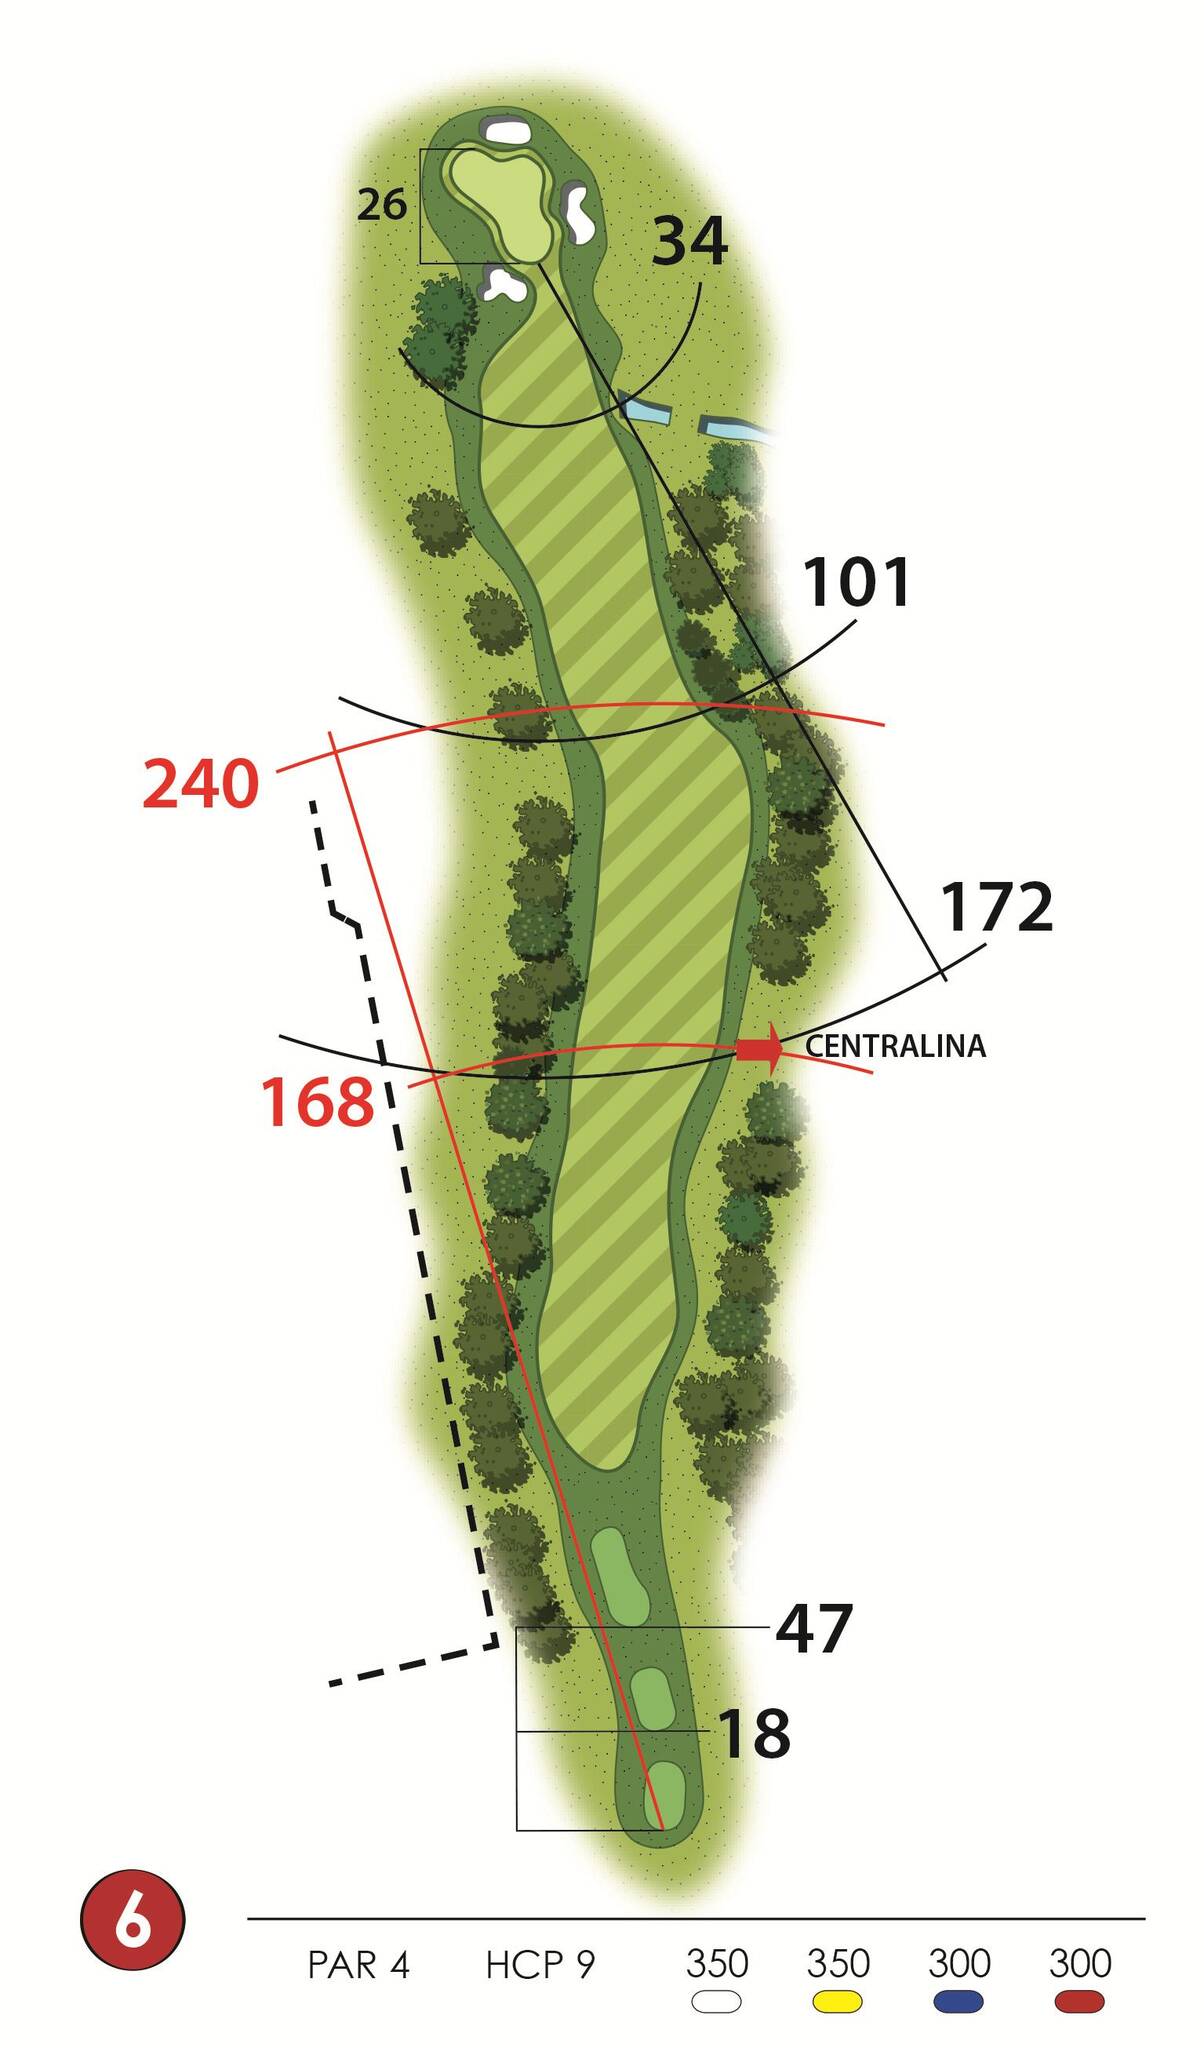
A medium-length par 4. A small wood on the right side and an undulating fairway suggest a drive from left to right.
The green shot, usually played with a short-medium iron, is aimed at a green well protected by two bunkers that narrow the entrance. About 20 meters before the green, a towering oak tree forces players positioned too far to the left to hit a high, accurate shot. The green is small and sloped, making it difficult to read.
Hole 7
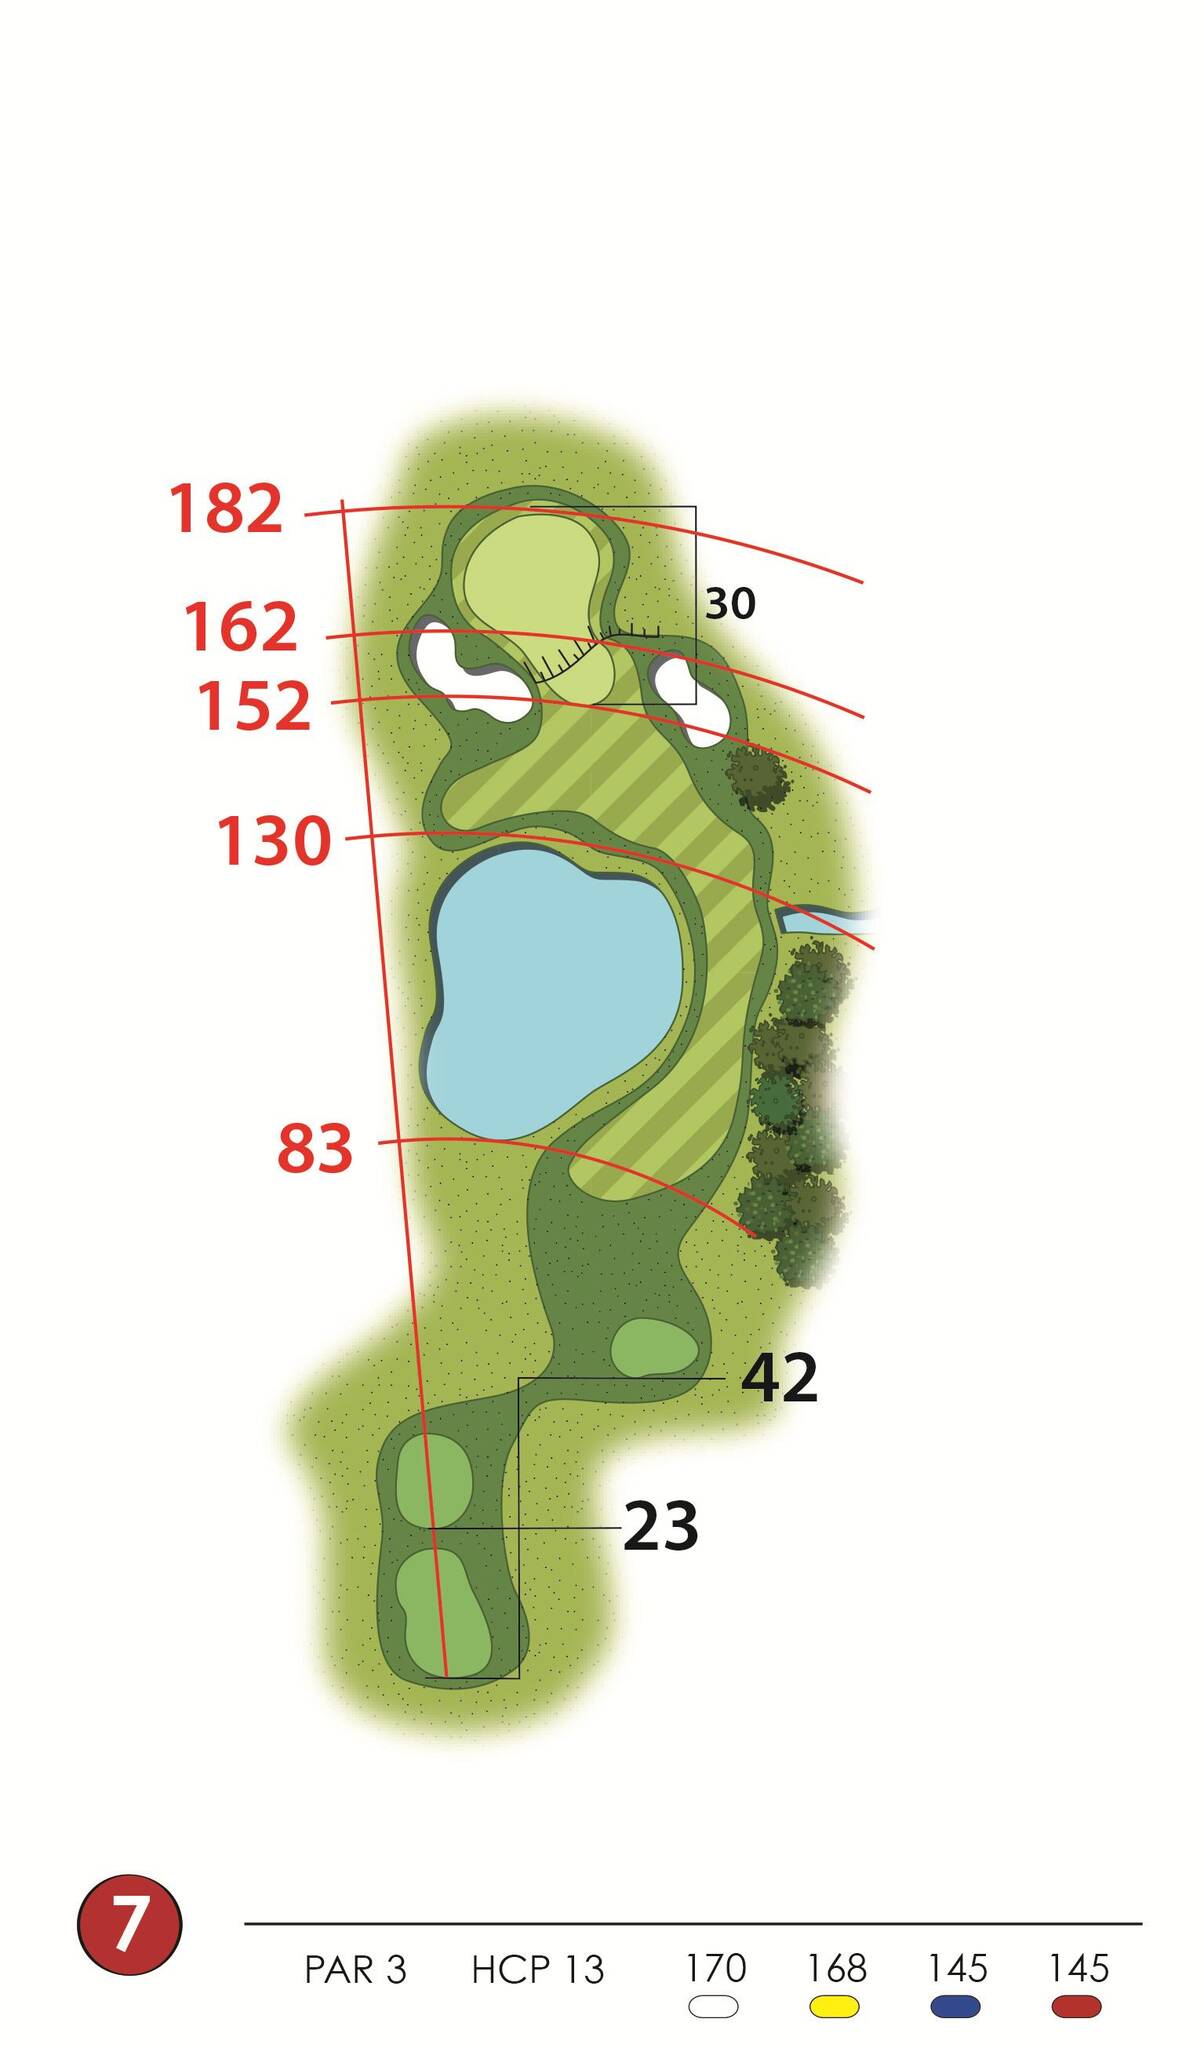
A challenging par 3. The lake between the tee and the green can only affect high handicappers, but the shot to a three-tiered green, played with a medium/long iron, requires a high and precise trajectory.
The bunker on the left protecting the long side of the green often comes into play, making the approach difficult, especially with the flag positioned on the high side.
Hole 8
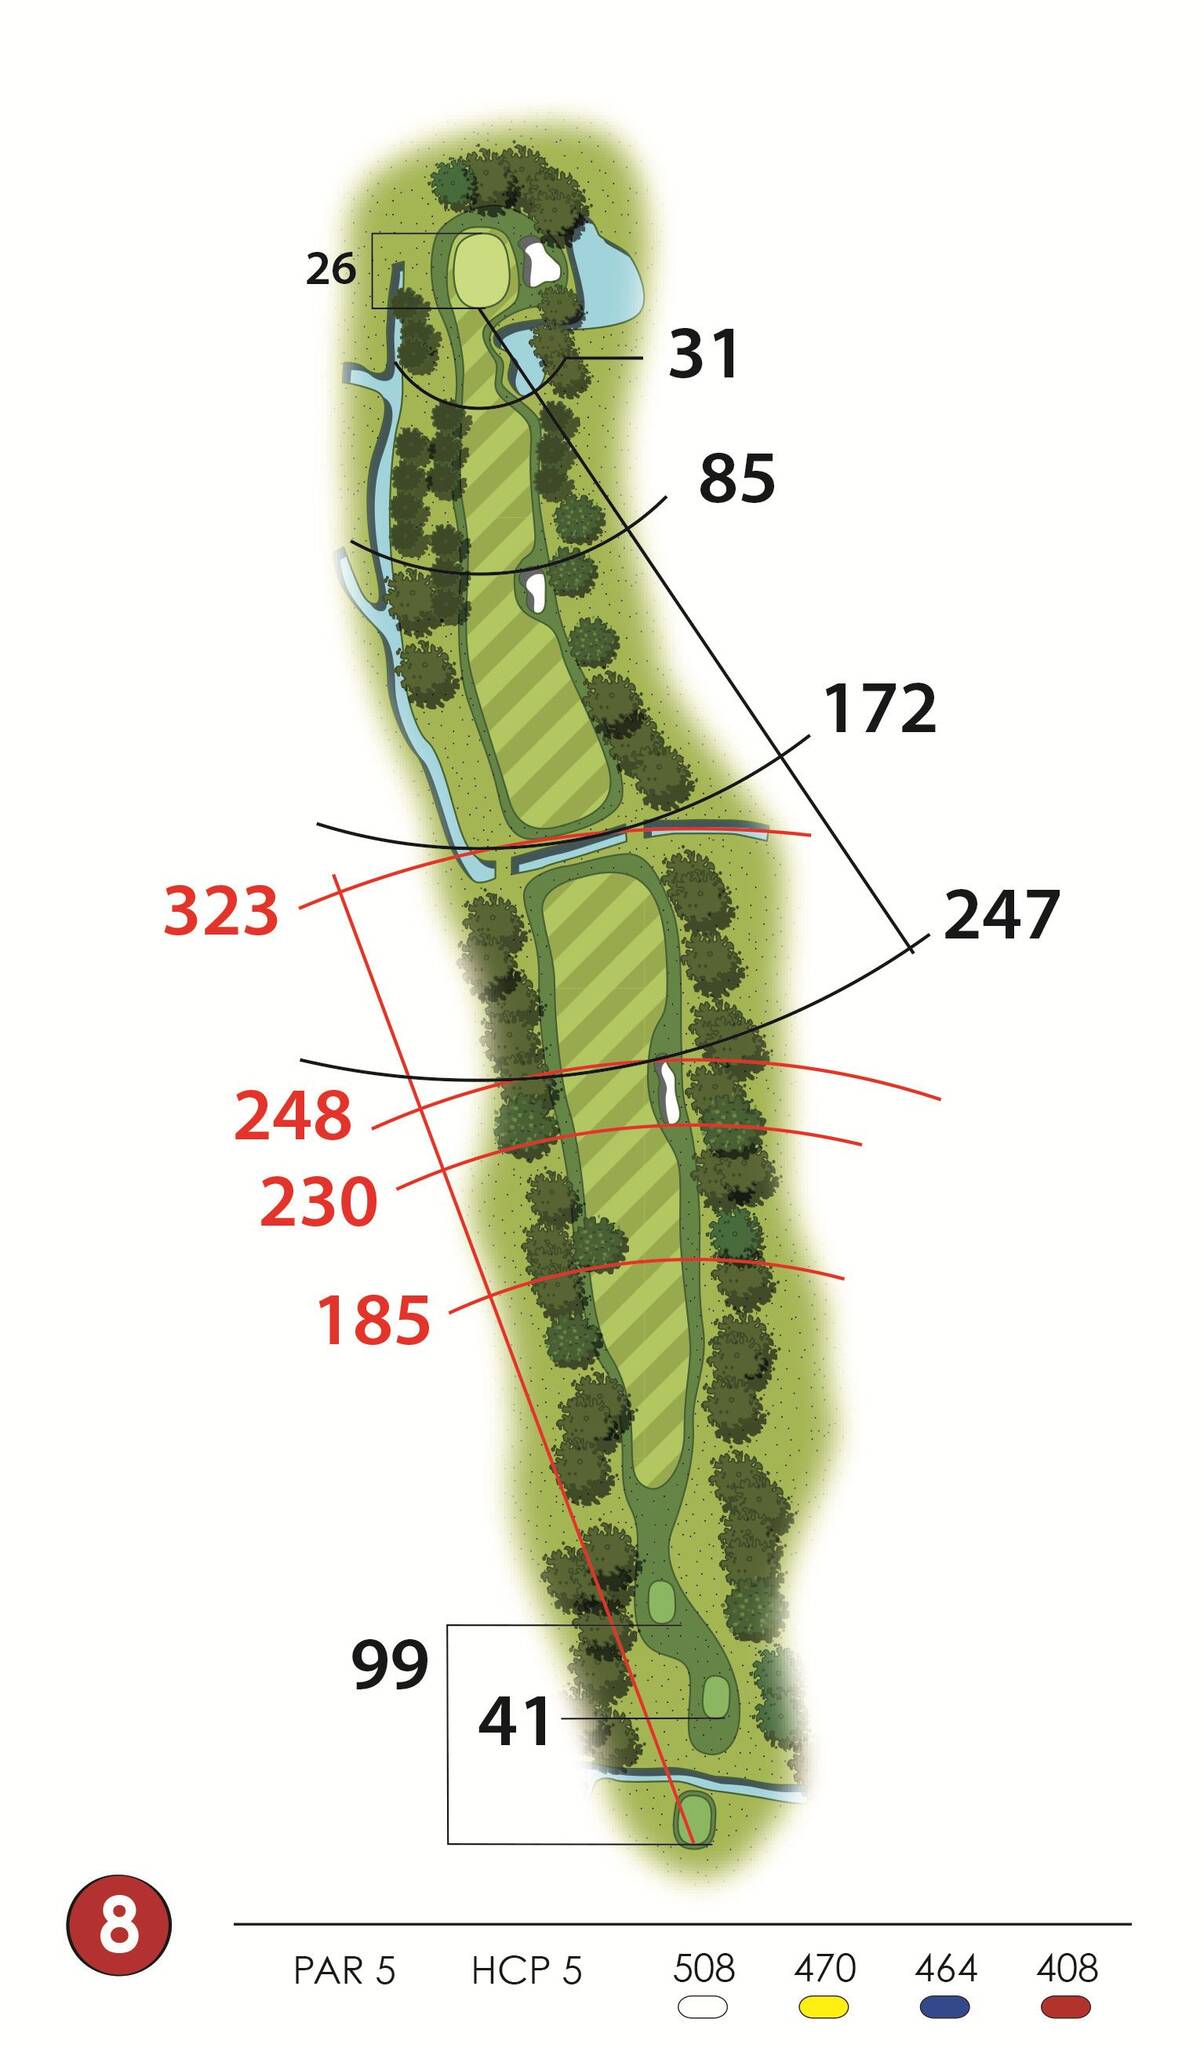
It's the longest hole on the course. The tee shot into a fairly wide fairway is threatened only by a bunker on the right side and plants on either side. The second shot must negotiate a ditch that runs across the entire fairway about 330 meters from the tee, making it a playable shot only for less experienced players.
A front bunker, but about 10 meters from the green, and the one on the right rarely affect the third shot played with a very short iron on a green without particular slopes.
Even for the most powerful players, it remains a difficult hole to reach in two shots.
Hole 9
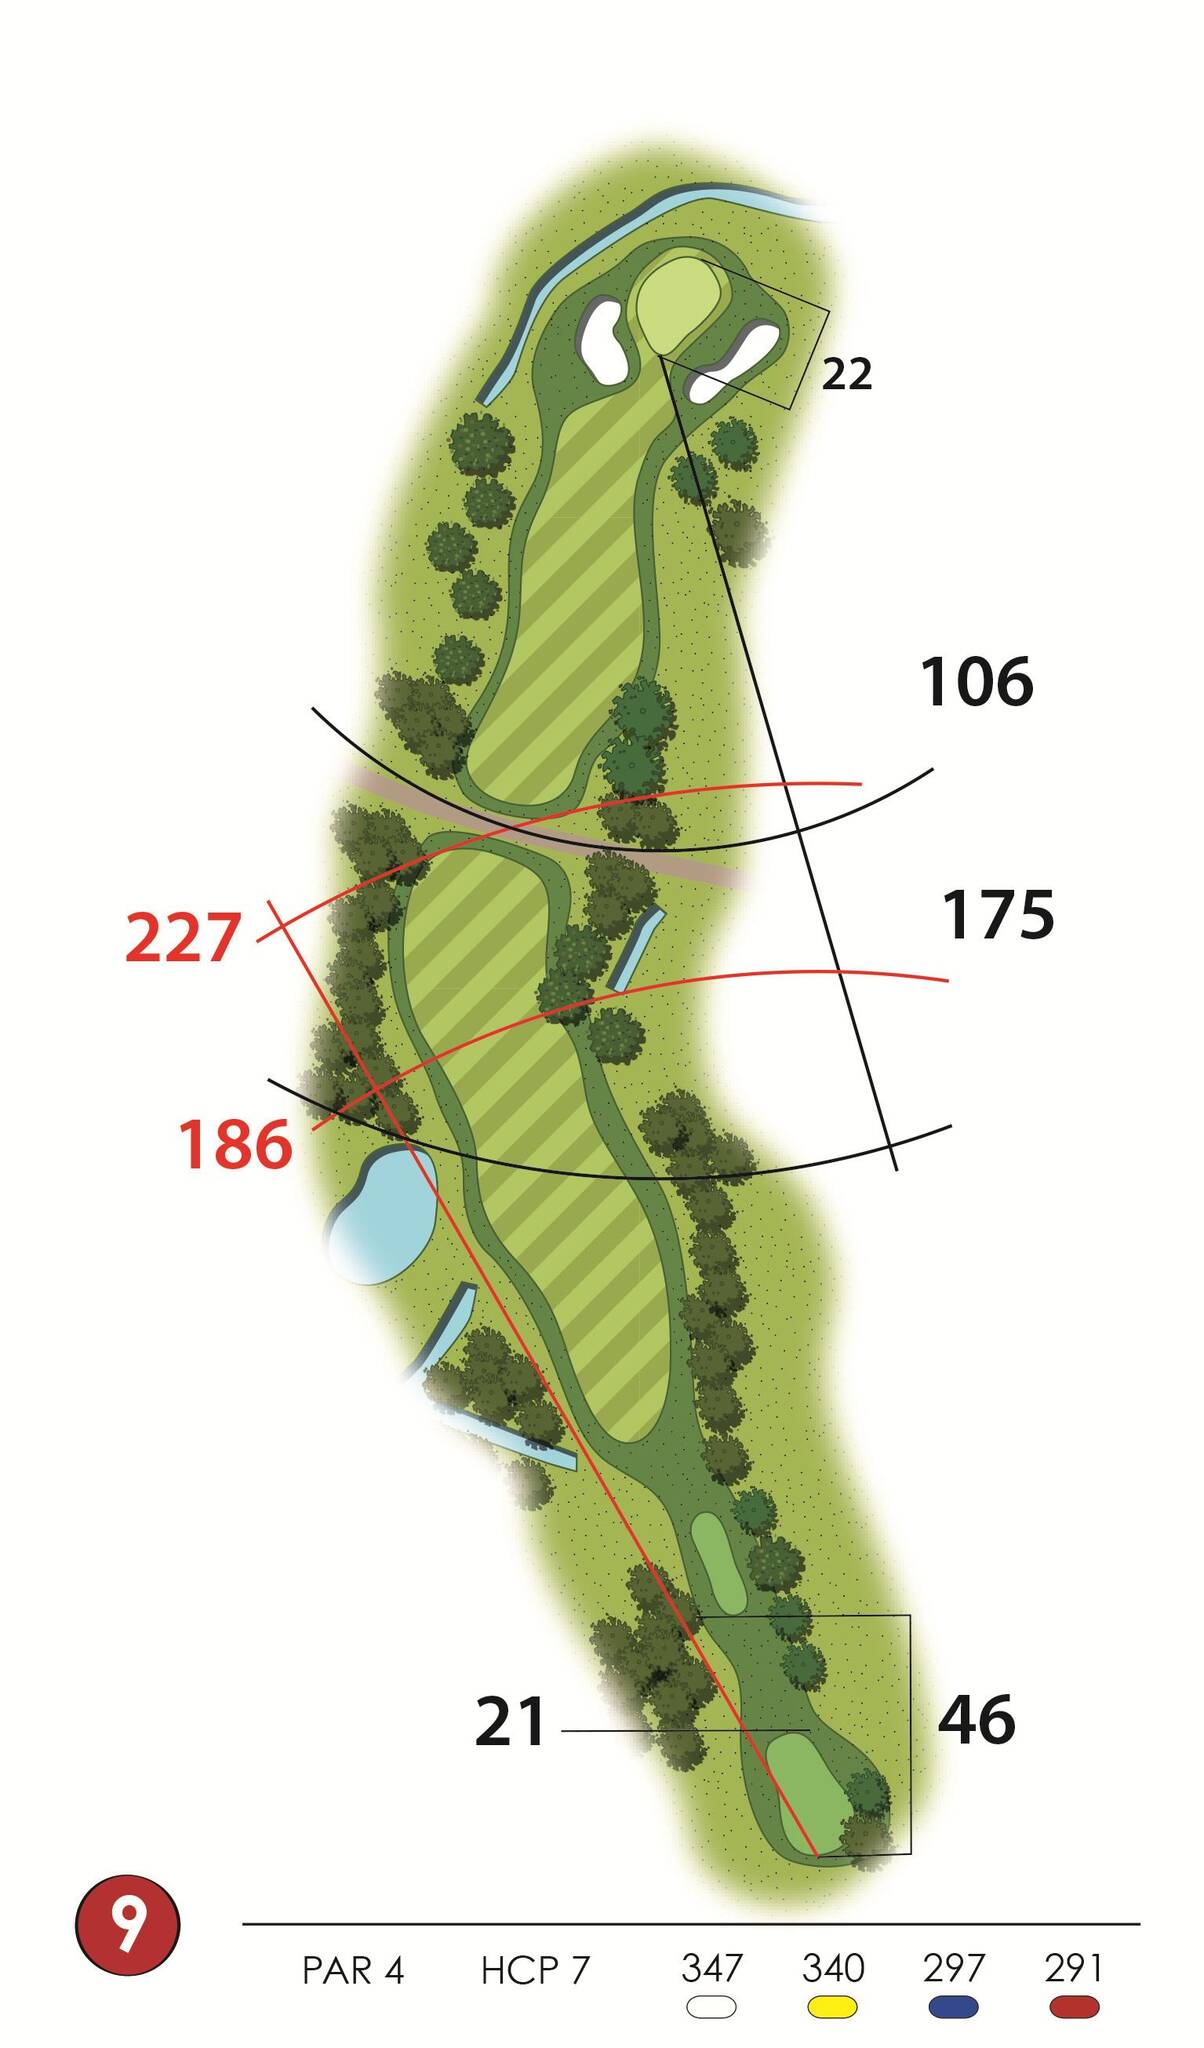
A tricky, slight dogleg to the right. Although the landing zone for the first shot is wider than it might appear from the tee, it's best to leave your drive in the bag. A first shot placed—if possible—to the left side leaves a semi-blind, medium-length second shot to an uphill green, where only the tip of the flag can be seen.
Here too, two bunkers on either side protect the entrance to the green, which has only a slight central step.
Hole 10
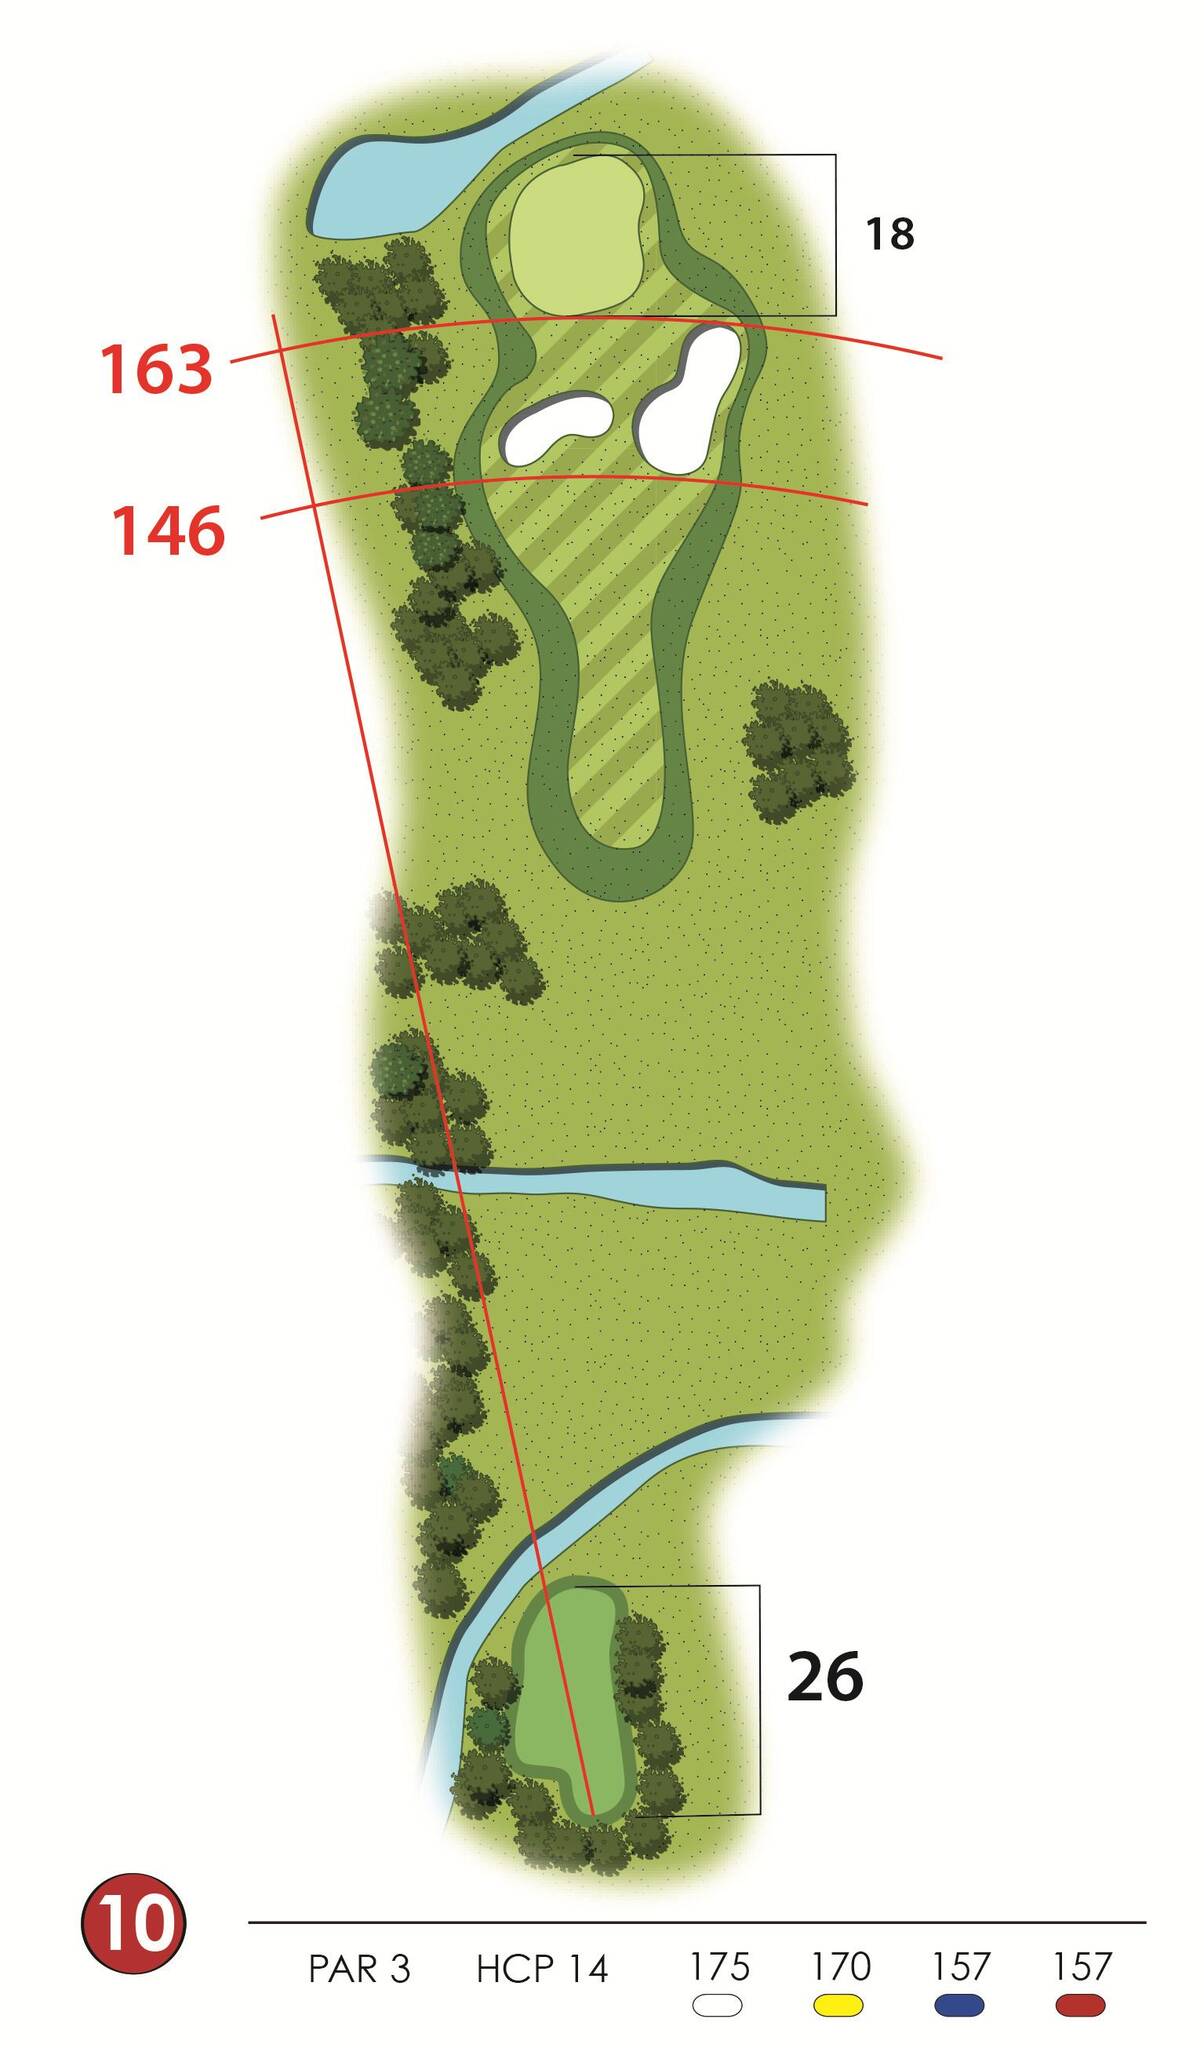
The beautifully elevated tee-off (the green is about ten meters lower) of this medium-length par 3 suggests playing at least one iron less than the hole's distance suggests. The old-style green is small and circular, with a step dividing it in two, and is also raised at the back. This makes it difficult for long shots to recover. Two front bunkers await short shots. Precision!
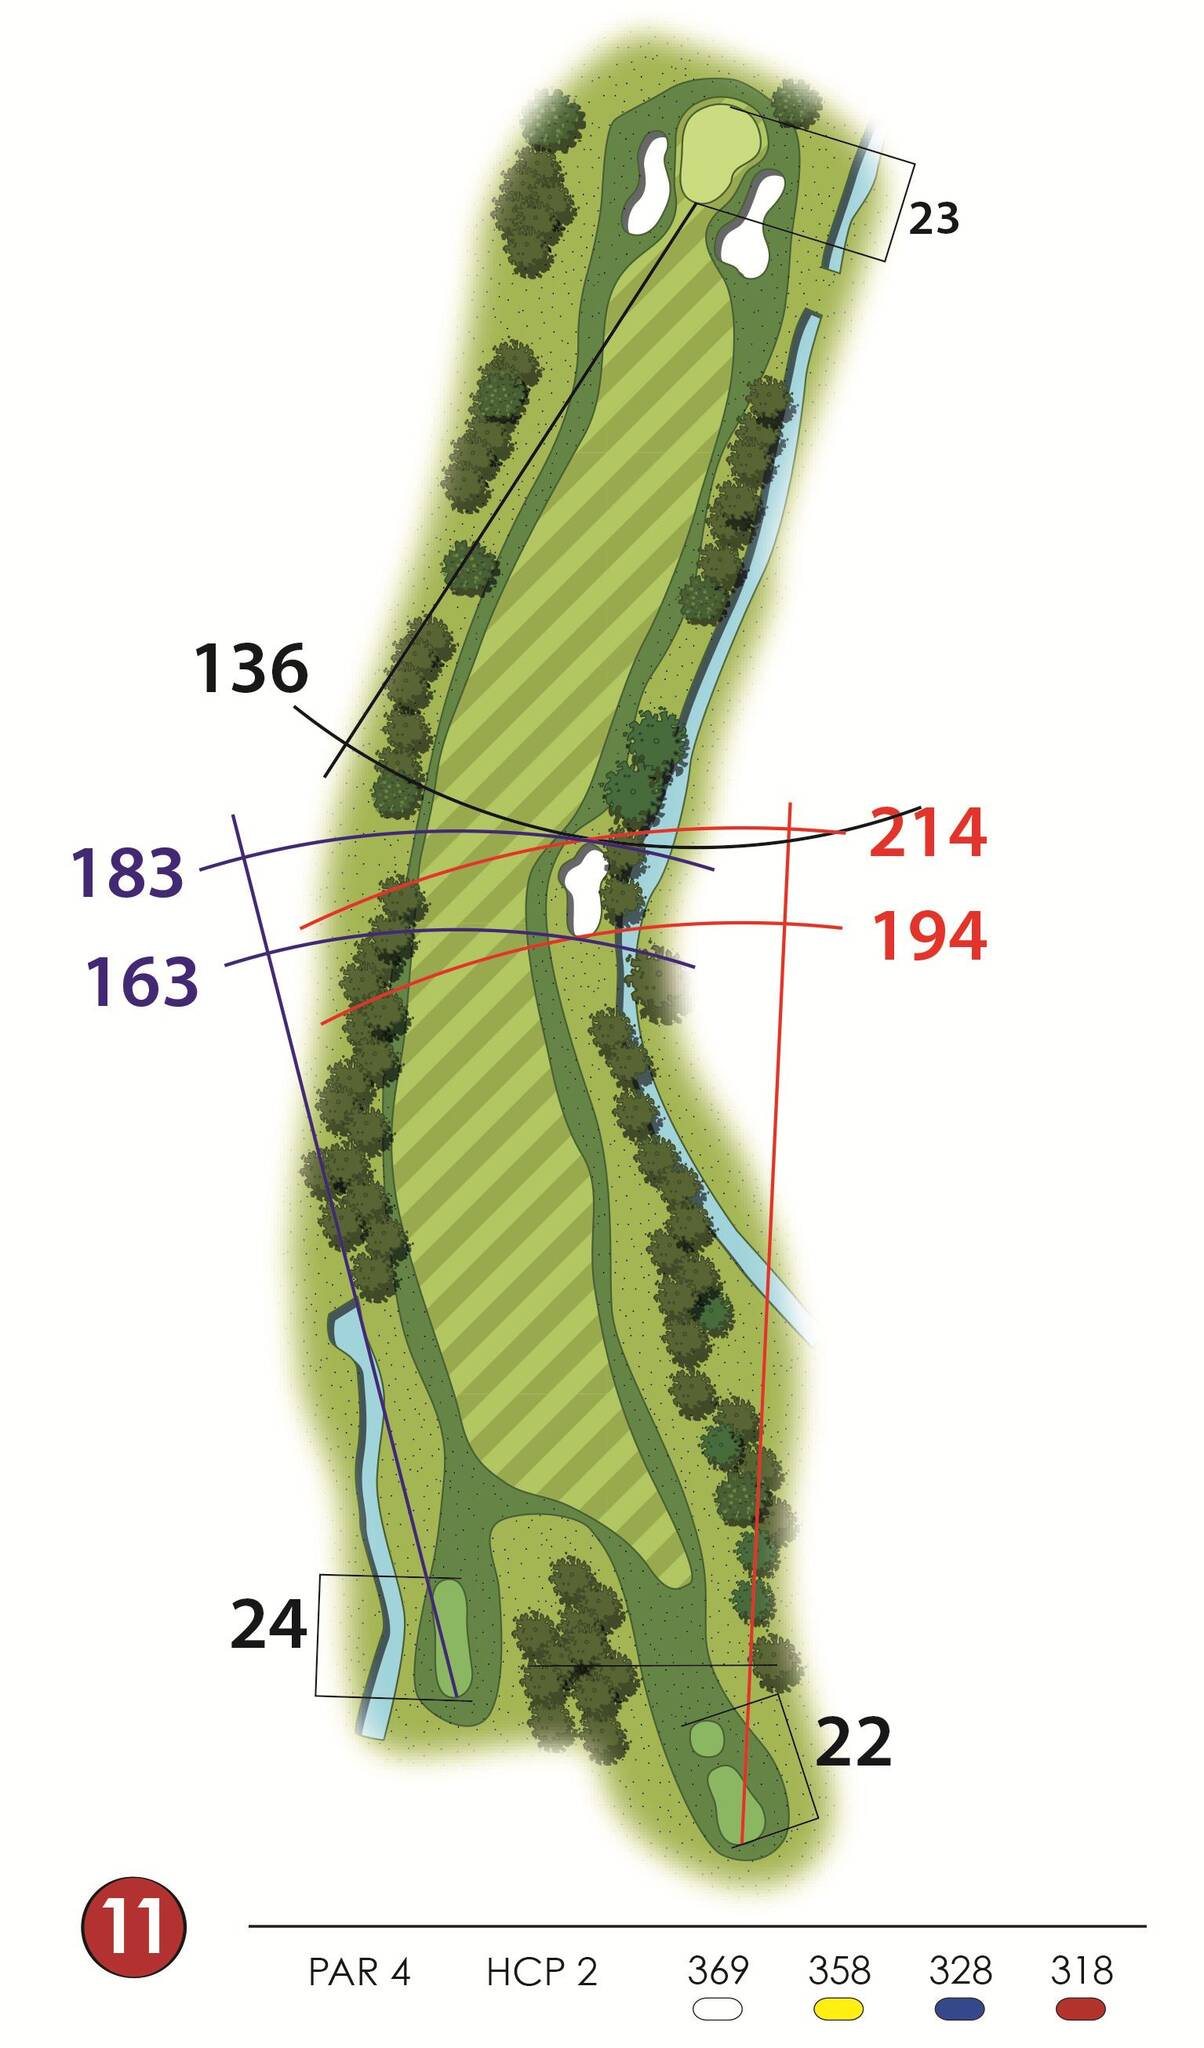
Hole 11
Despite being a medium-length dogleg Par 4 to the right, statistics show it to be the second most difficult hole on the course. The tee shot once again requires precision, as the right side is protected by a bunker and a small lake. You have to drive at least 200 yards to get a good view of the green, so powerful players can avoid hitting a drive. The green is raised at the front, and consequently slopes downwards towards the back: stopping the ball becomes difficult for a second shot, usually made with a medium-length iron.
Green further protected by 2 lateral bunkers and with treacherous slopes.
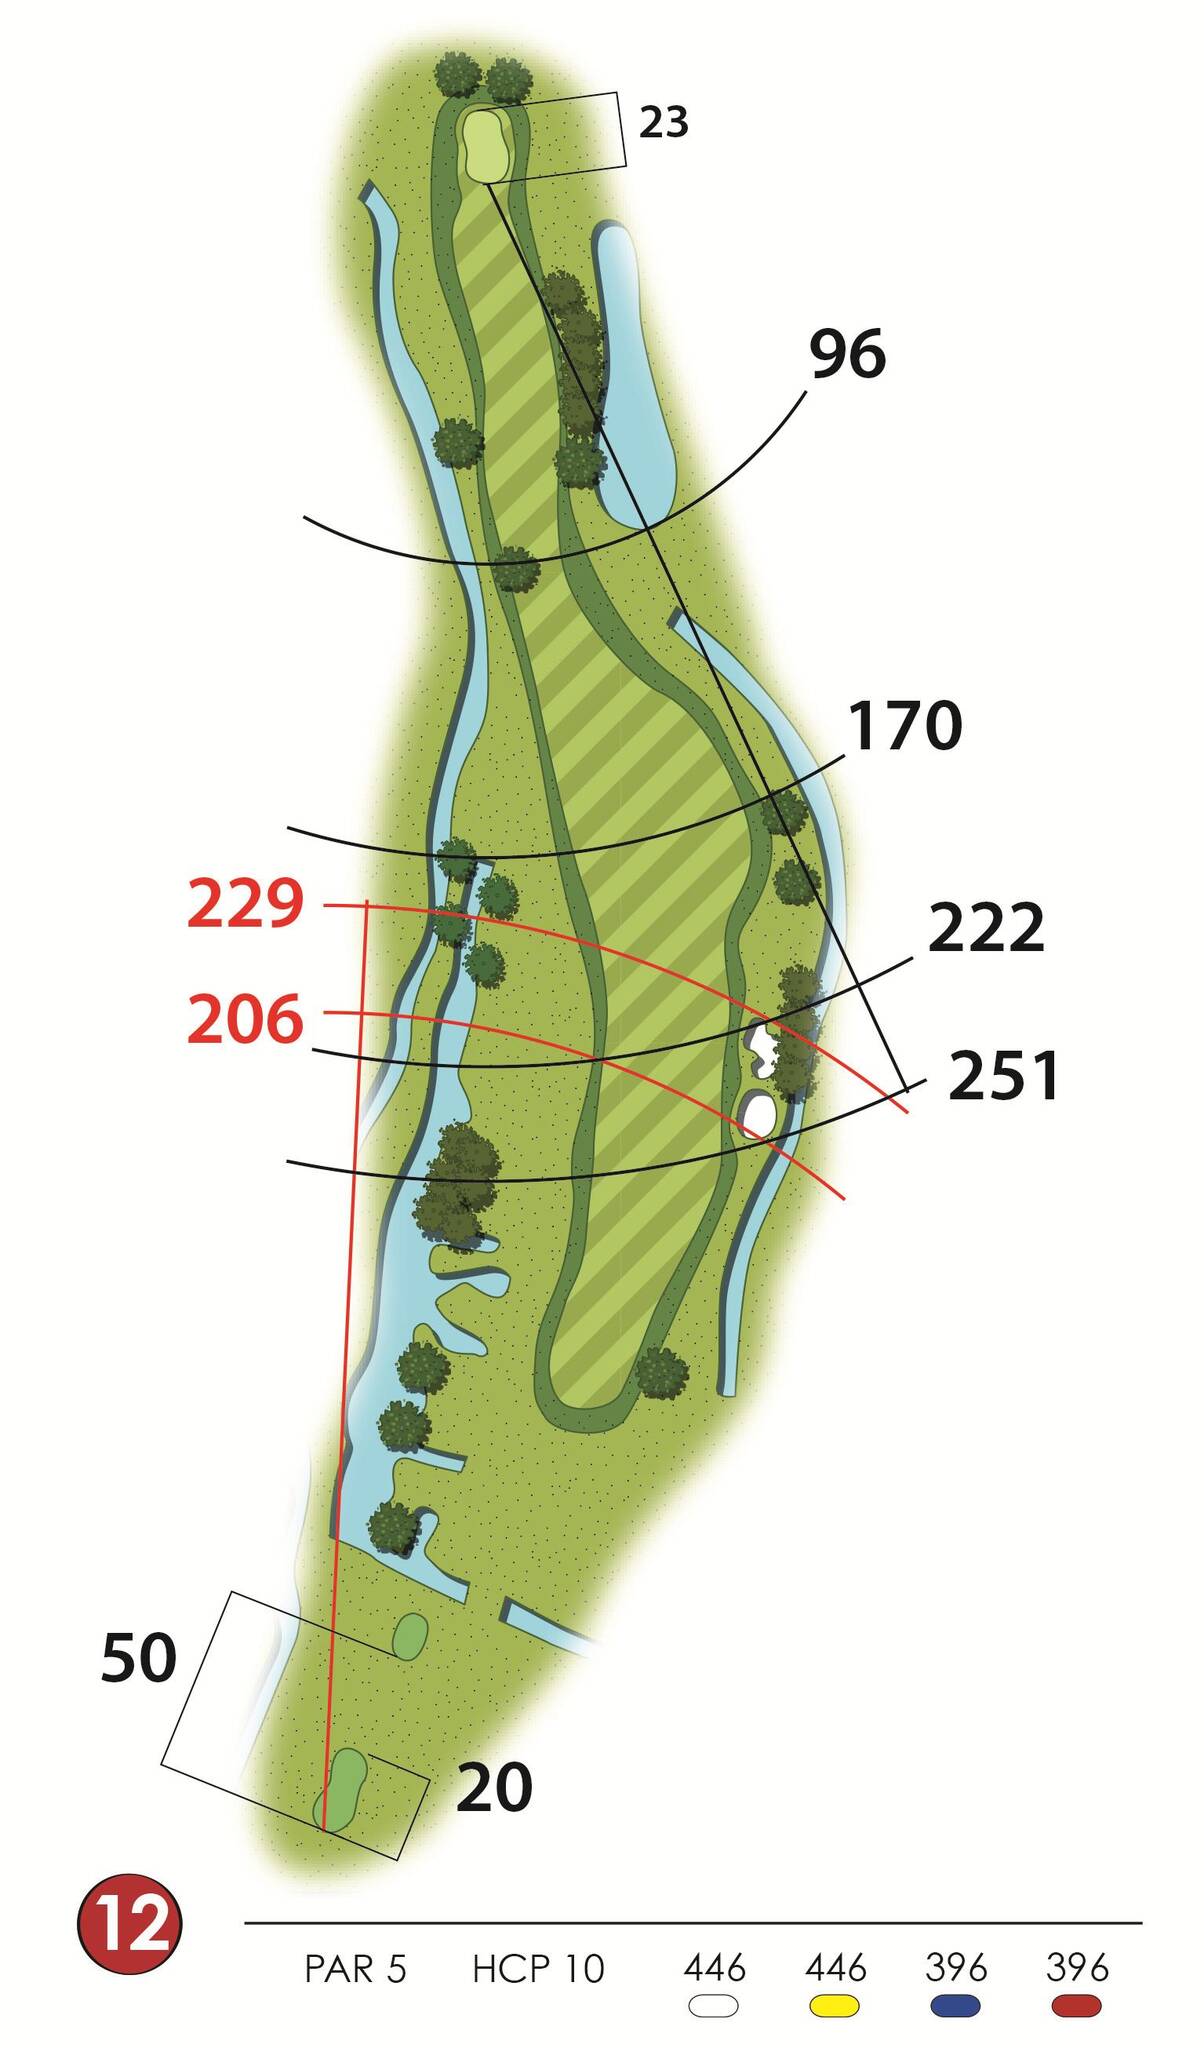
Hole 12
This short Par 5 is characterised by the presence on the second shot of a centuries-old oak tree in the middle of the fairway, which has grown over time together with the historic members of Vigevano golf.
Over the years, this hole has always represented a challenge to conquer. It has undergone some adjustments over time, but has retained the ability to leave a lasting impression on the minds of those who play it.
With improved equipment and balls, the hole is now accessible to even the most powerful players with a second shot, even with an iron. However, even the best players will still risk losing their shot due to the small lake that protects the right side of the hole in the last 100 meters.
For “normal” players, a first shot towards the 2 bunkers on the right and the second to the “oak” leaves a pitch of third to a green remade a few years ago, with many small undulations that must be studied carefully.
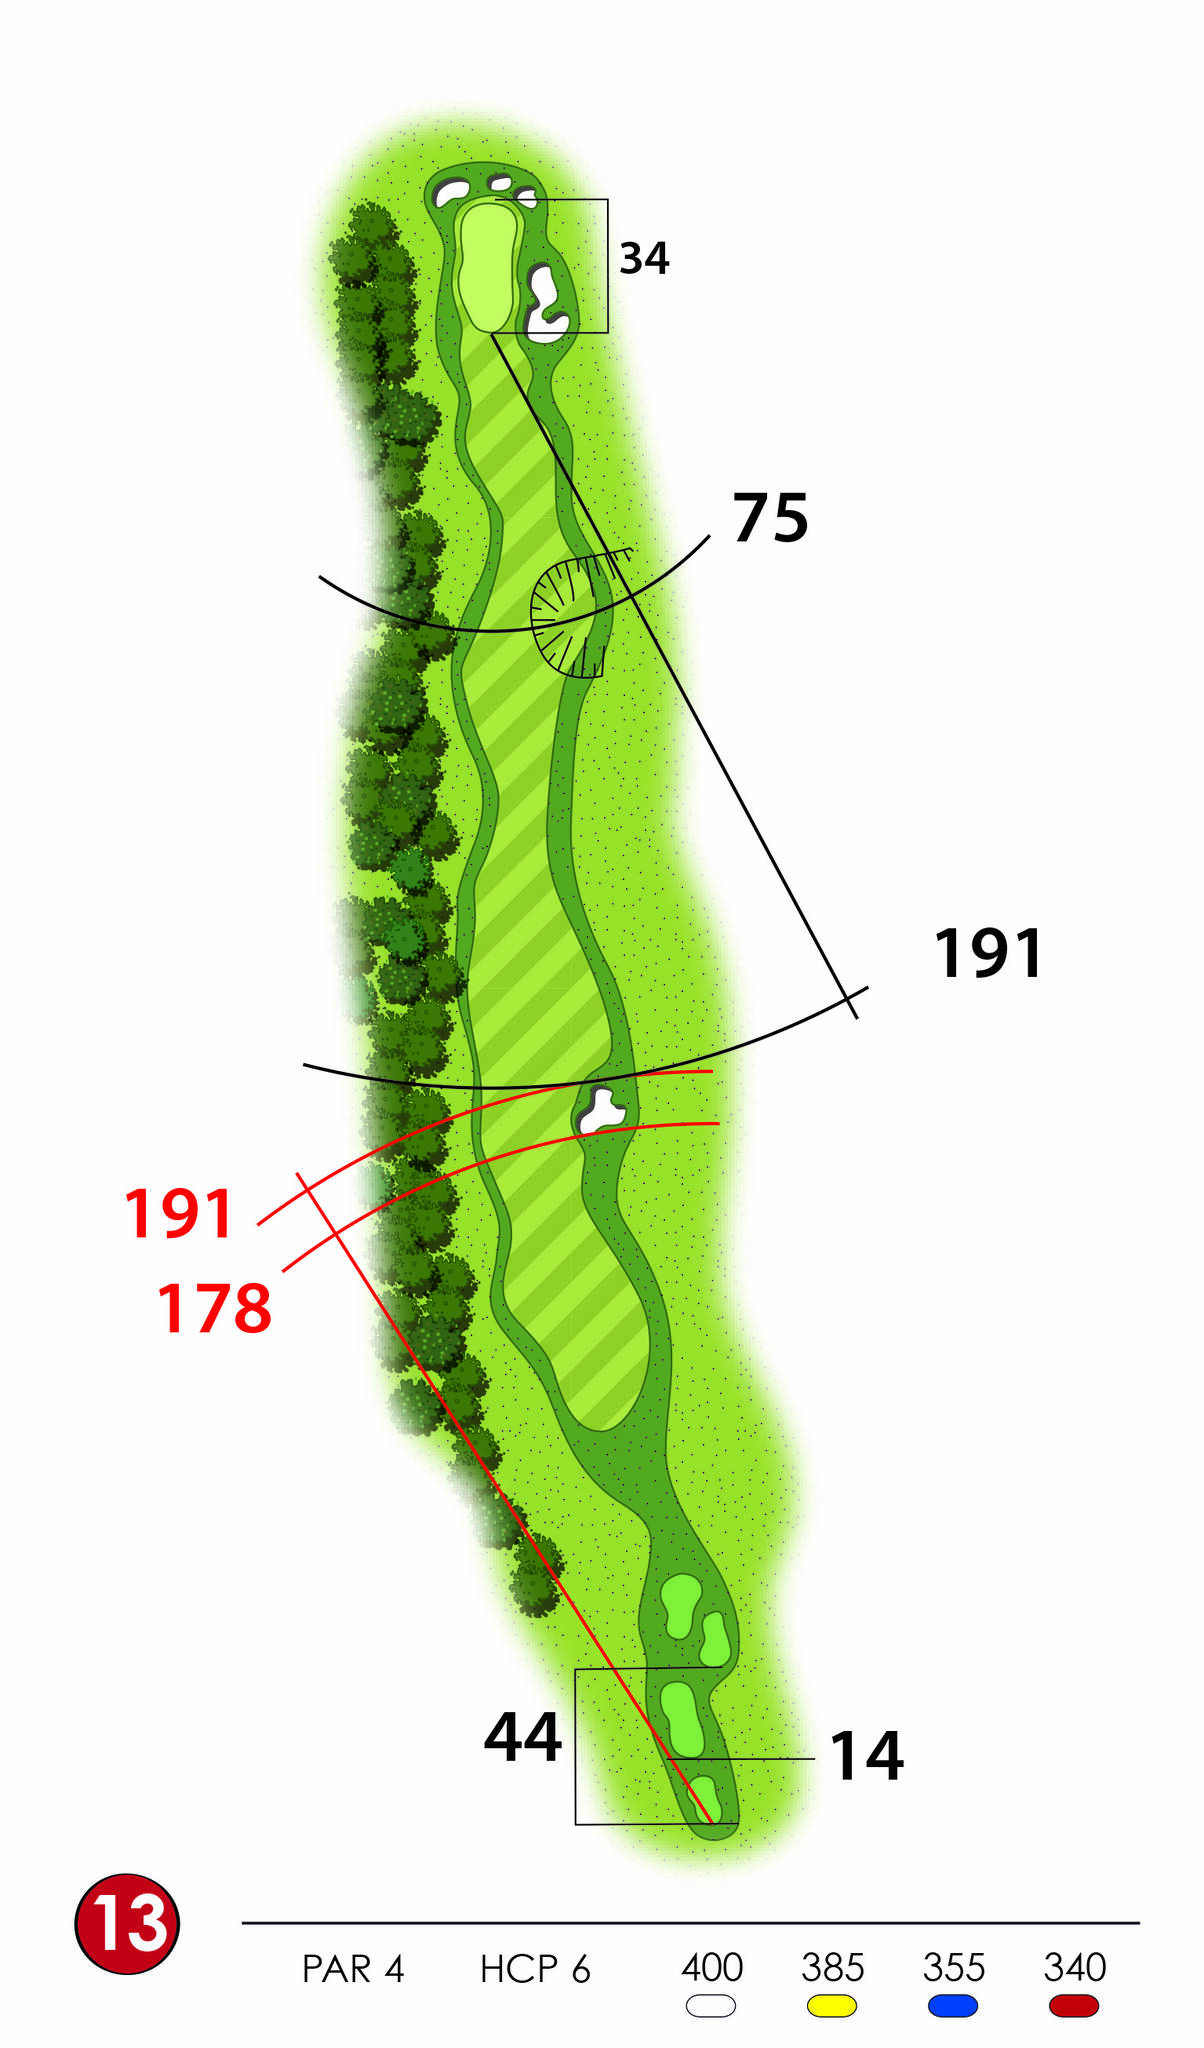
Hole 13
Head back up the course to tackle this long, completely straight Par 4. The bunker on the right can be overcome with a medium-length drive, and the woods along the entire left side (marked as a water hazard) are only available for very tight shots.
The second, inevitably played with a long iron or wood, is used to a very long green, protected on the right by a large bunker but also allowing for a roll. The green is multi-level but easy to read.
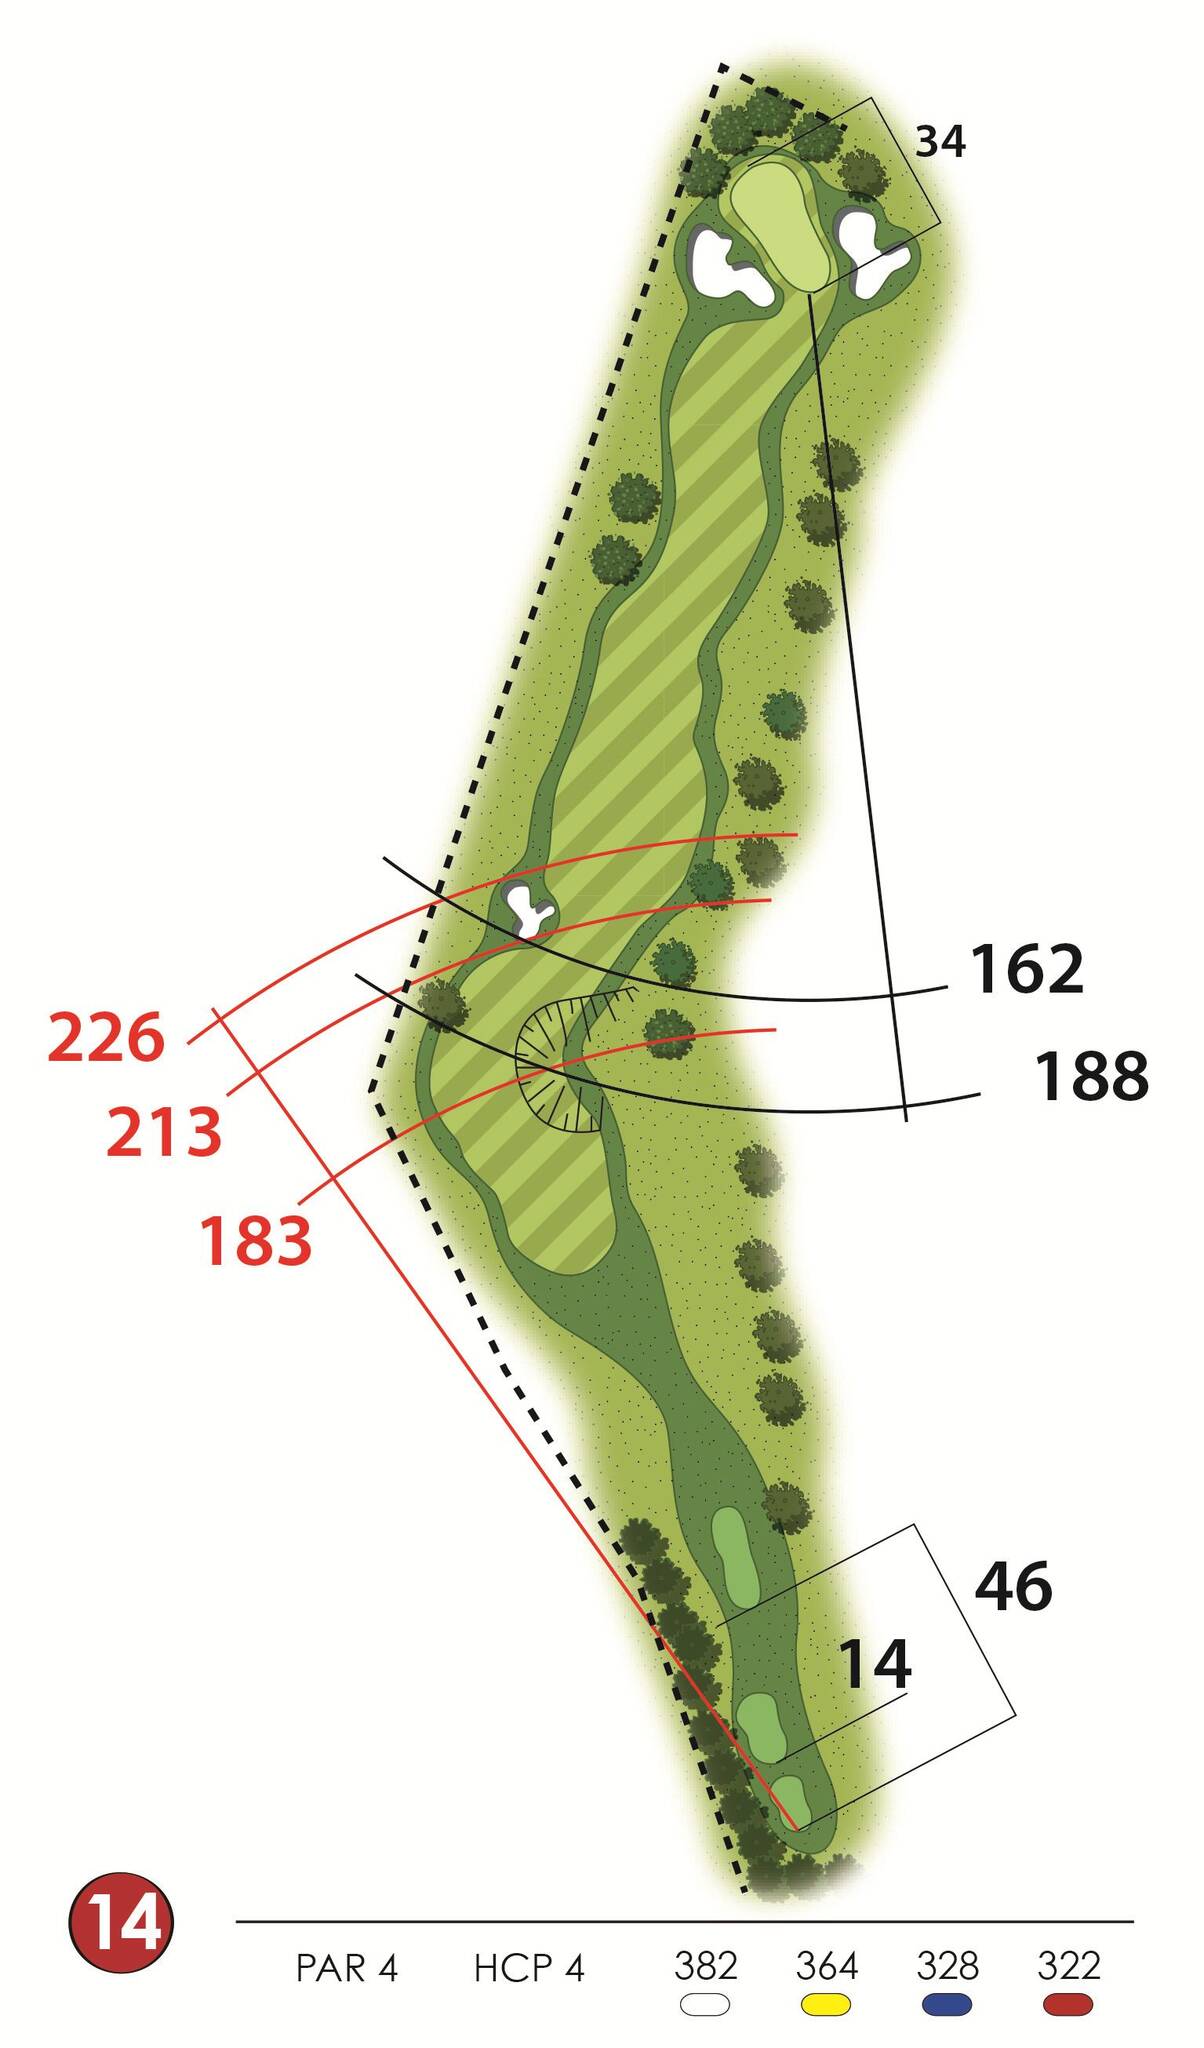
Hole 14
A rather long and decidedly challenging dogleg to the right.
The hole is flanked on the left side by an out-of-bounds boundary along its entire length. On the other side, a natural depression in the ground catches many tee shots, leaving the second shot obscured by some plants. The priority on this hole is therefore to stay on the fairway. For longer players, a fairway wood will suffice for the tee shot.
The second shot, usually played with a long iron, must be airborne because the green (very large and slightly sloping) is well protected by a bunker that covers three-quarters of the green on the left side. Sharp slopes make it even more difficult to leave the green with a par.
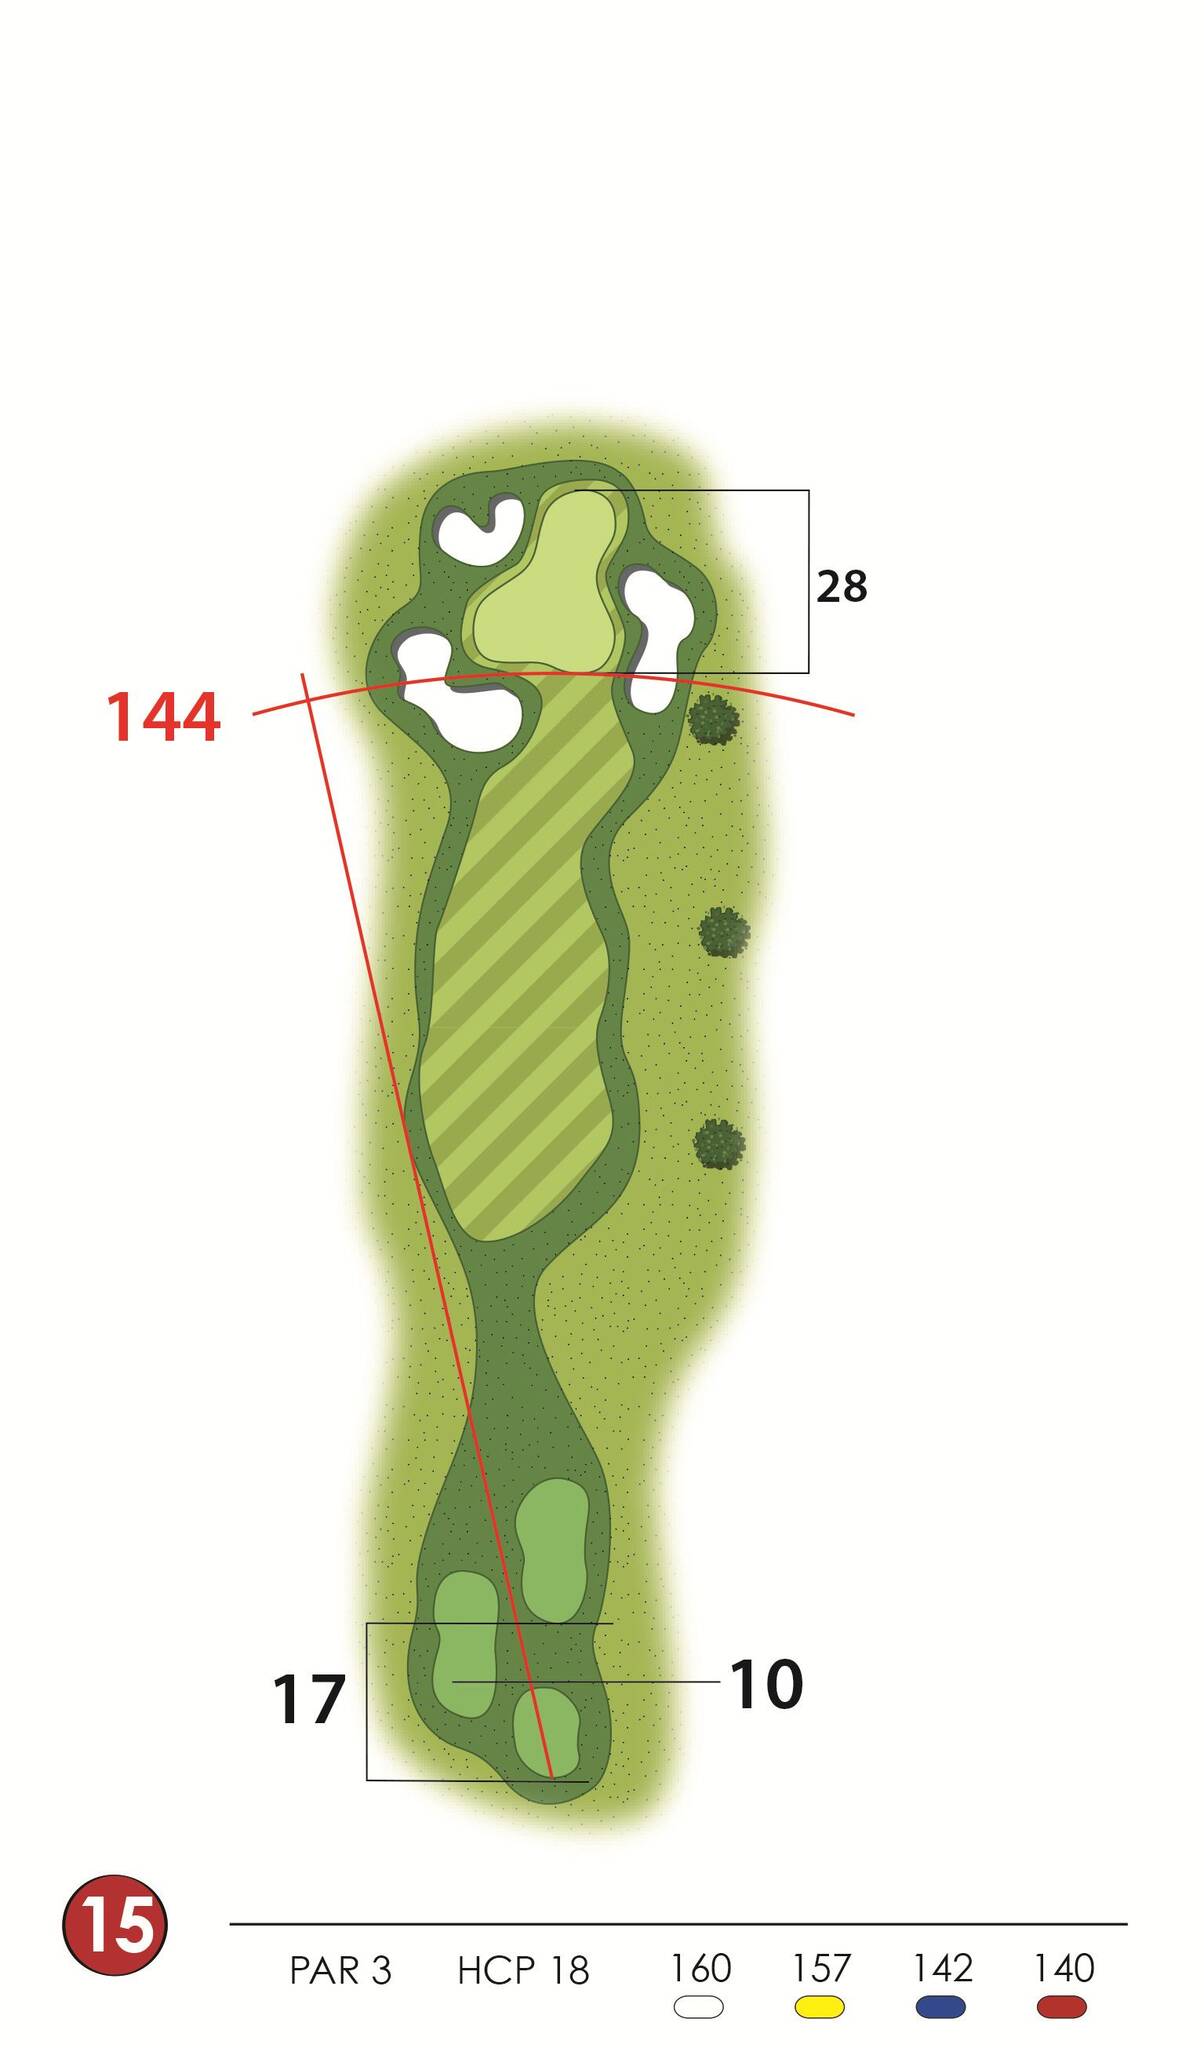
Hole 15
The HCP chart says that this par 3 is the easiest hole on the course.
But the green is practically surrounded by bunkers, and the only non-flying access to the green is through the flag positioned short on the right side. The clover-shaped green narrows at the back, requiring precision for balls that haven't reached the green. From the 8-iron to the 5-iron.
Hole 16
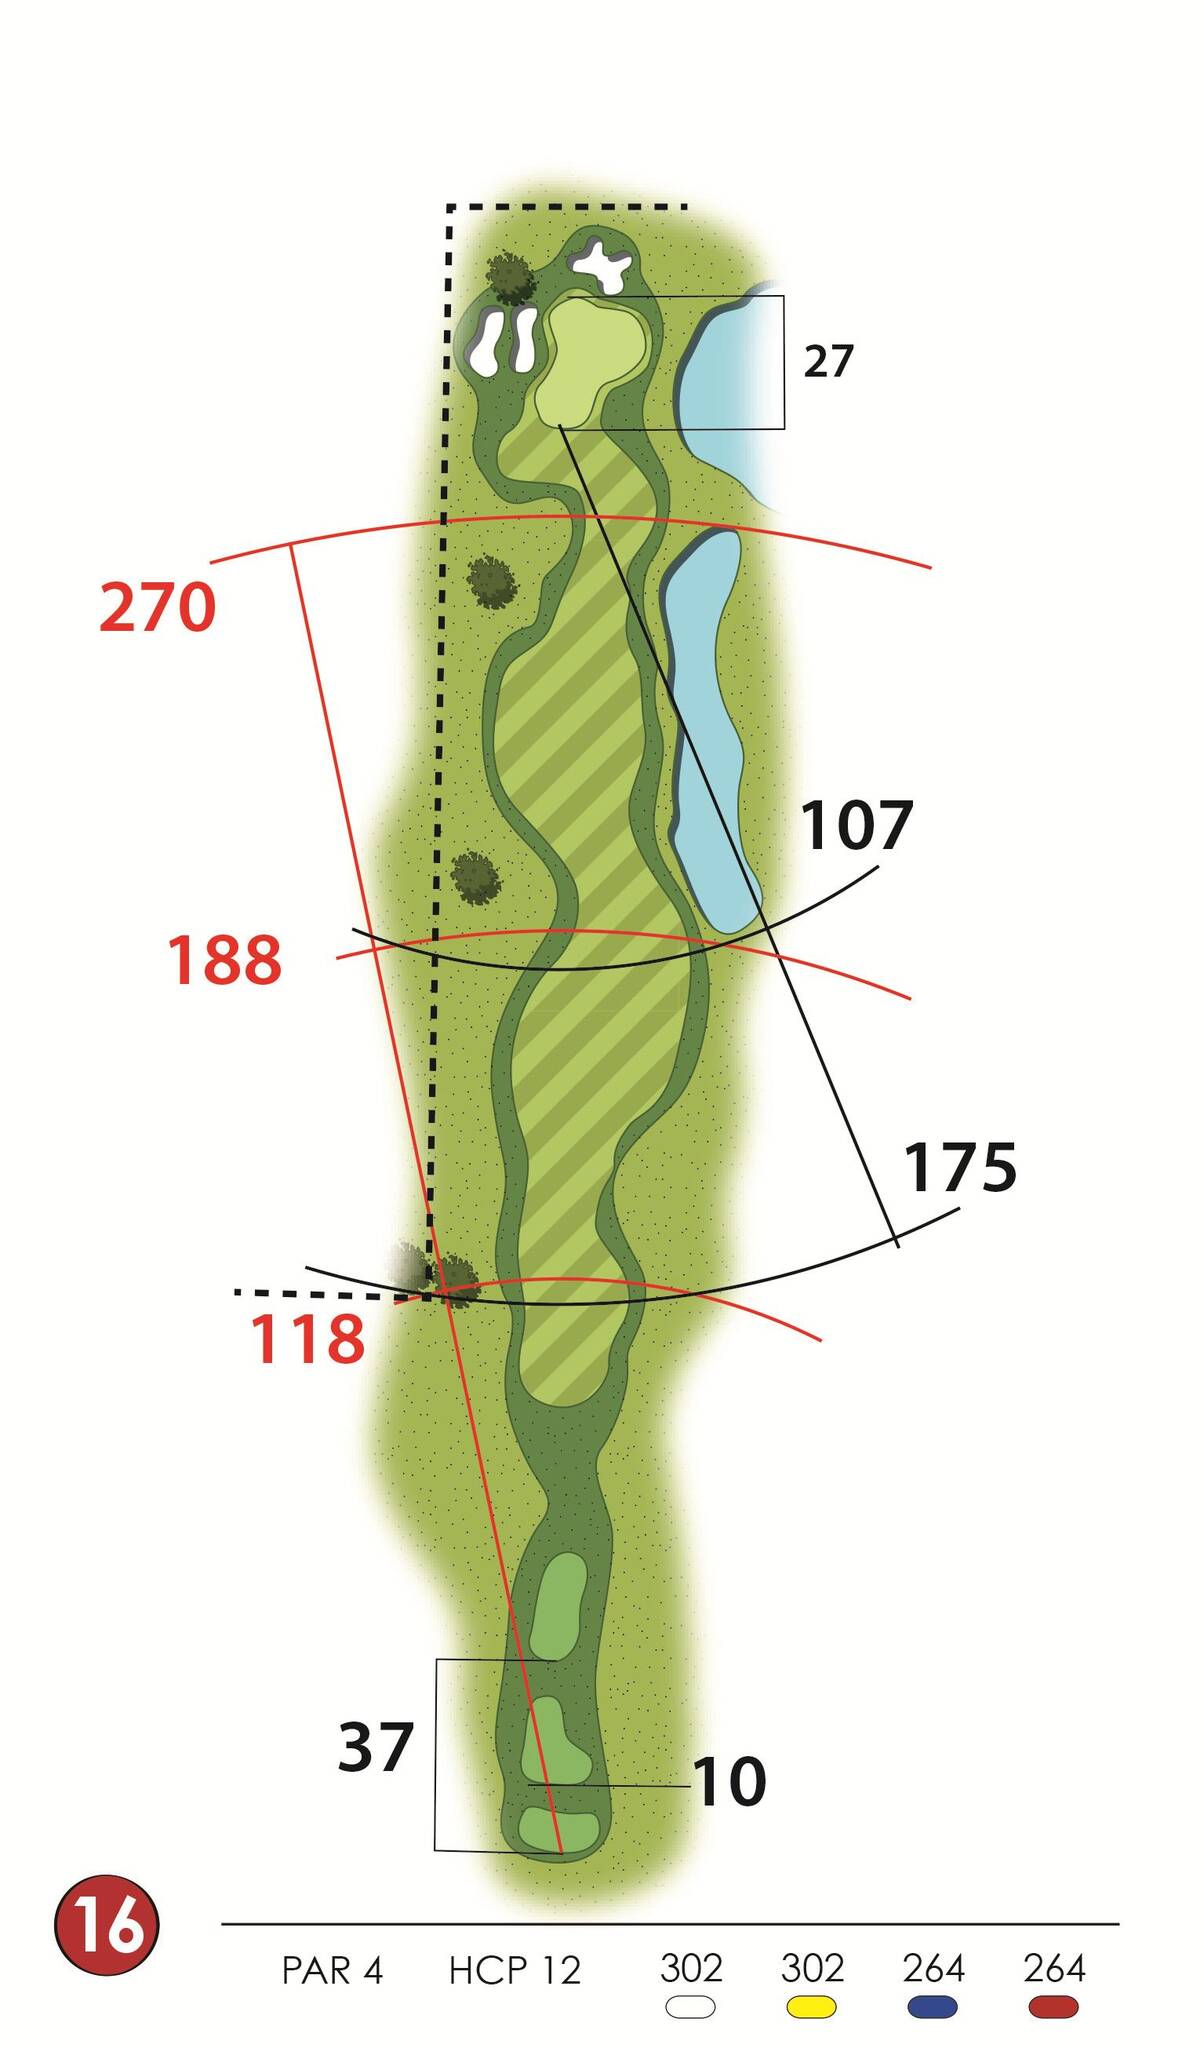
Birdie or double bogey? The hole's short length might tempt the more daring to approach the green with a drive, but the out-of-bounds that runs along the entire left side of the hole and a lake that begins about 200 yards from the tee on the right suggest an iron from the tee.
The second shot played with a short iron still leaves a good chance of birdie when the flag is short. It's a different story if the flag is on the step behind the green or positioned to the right near the lake that borders the green itself.
Hole 17
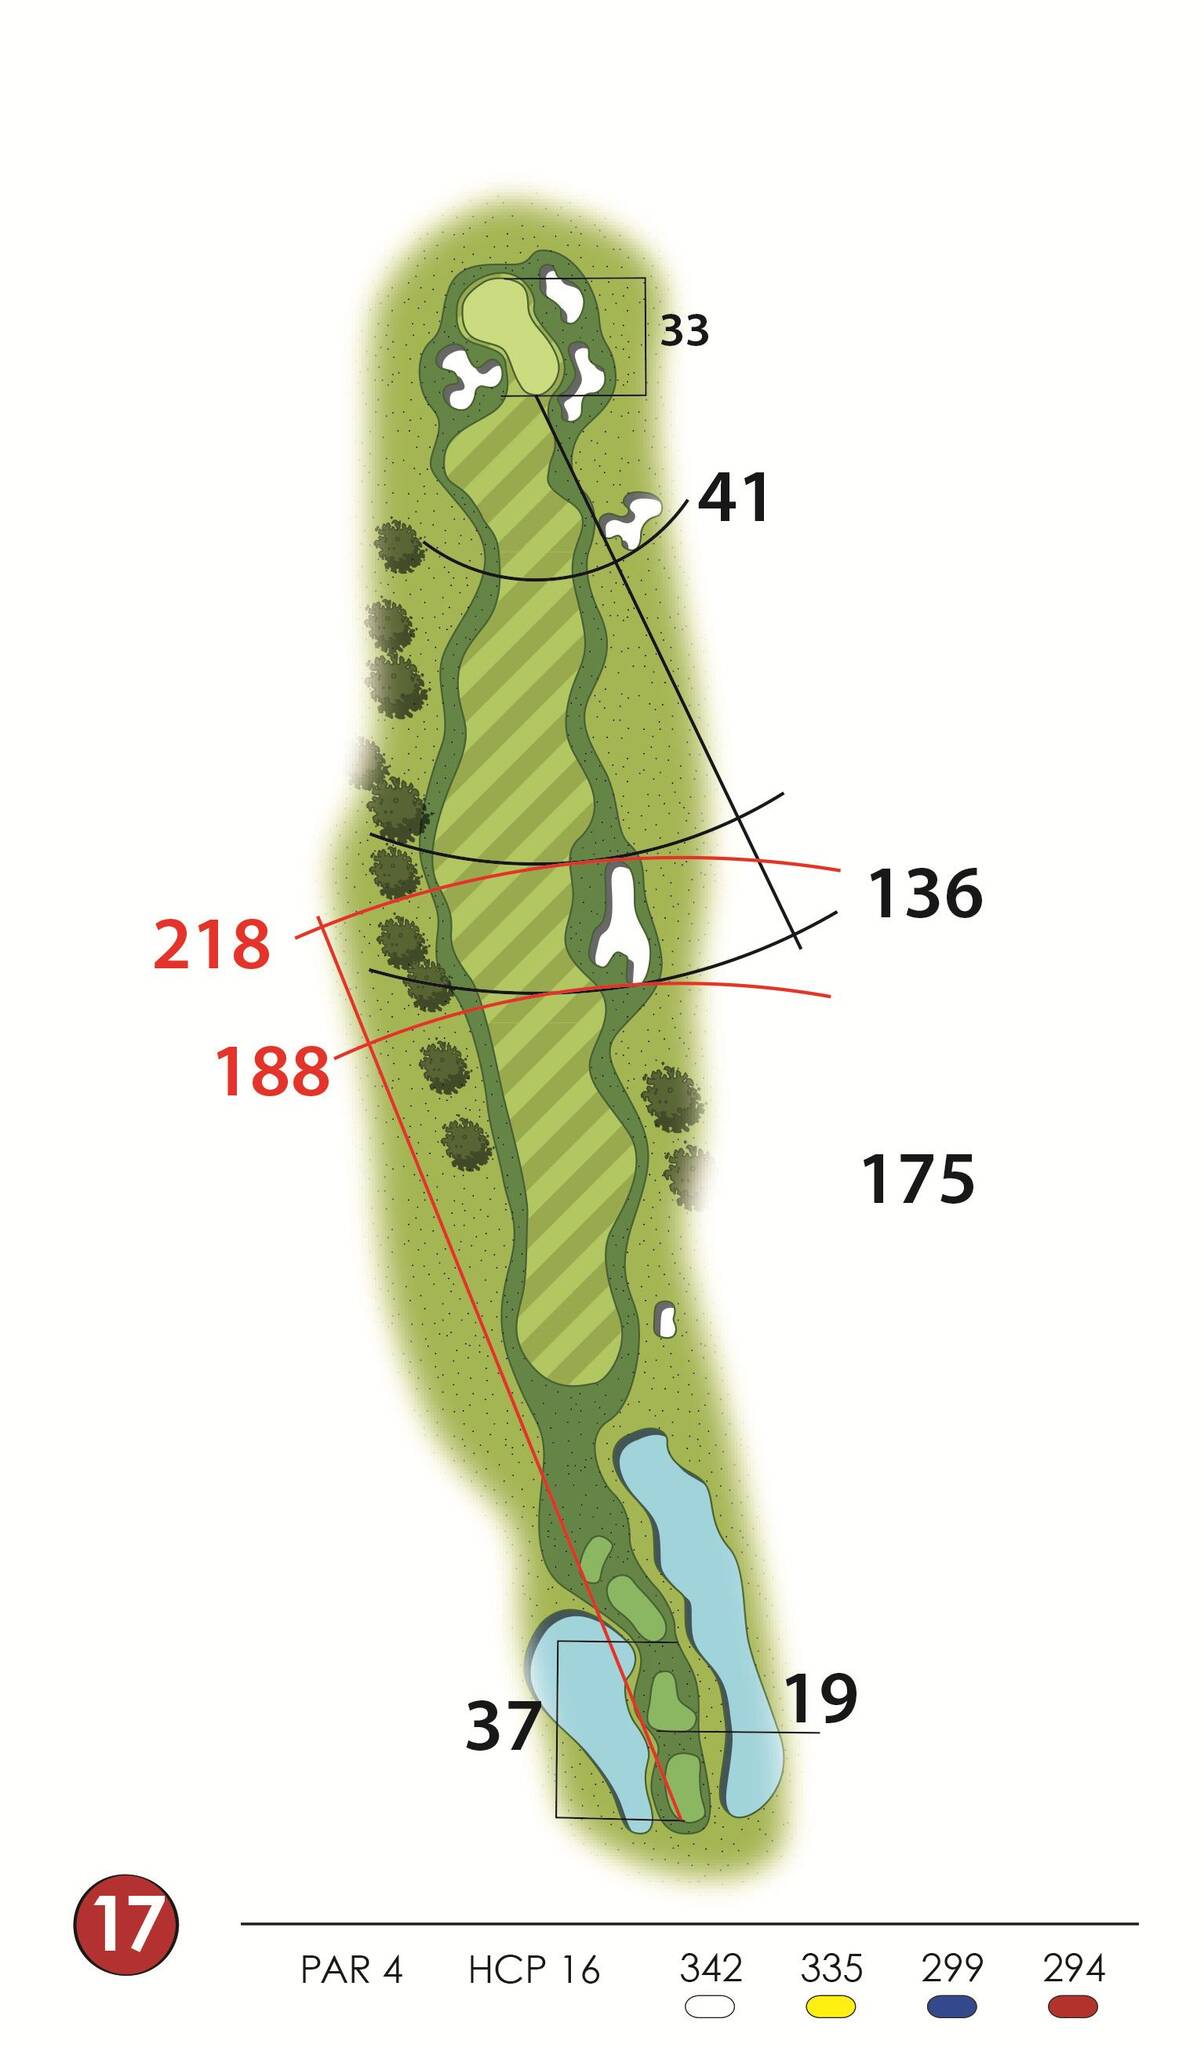
Tee shots are uneventful. Two bunkers on the right side are the only problem. The hole's moderate length leaves a medium/short iron to the green, which, however, is well protected at the entry by a bunker on the left side.
Wide green especially at the back, which offers various flag placement possibilities on some complicated slopes.
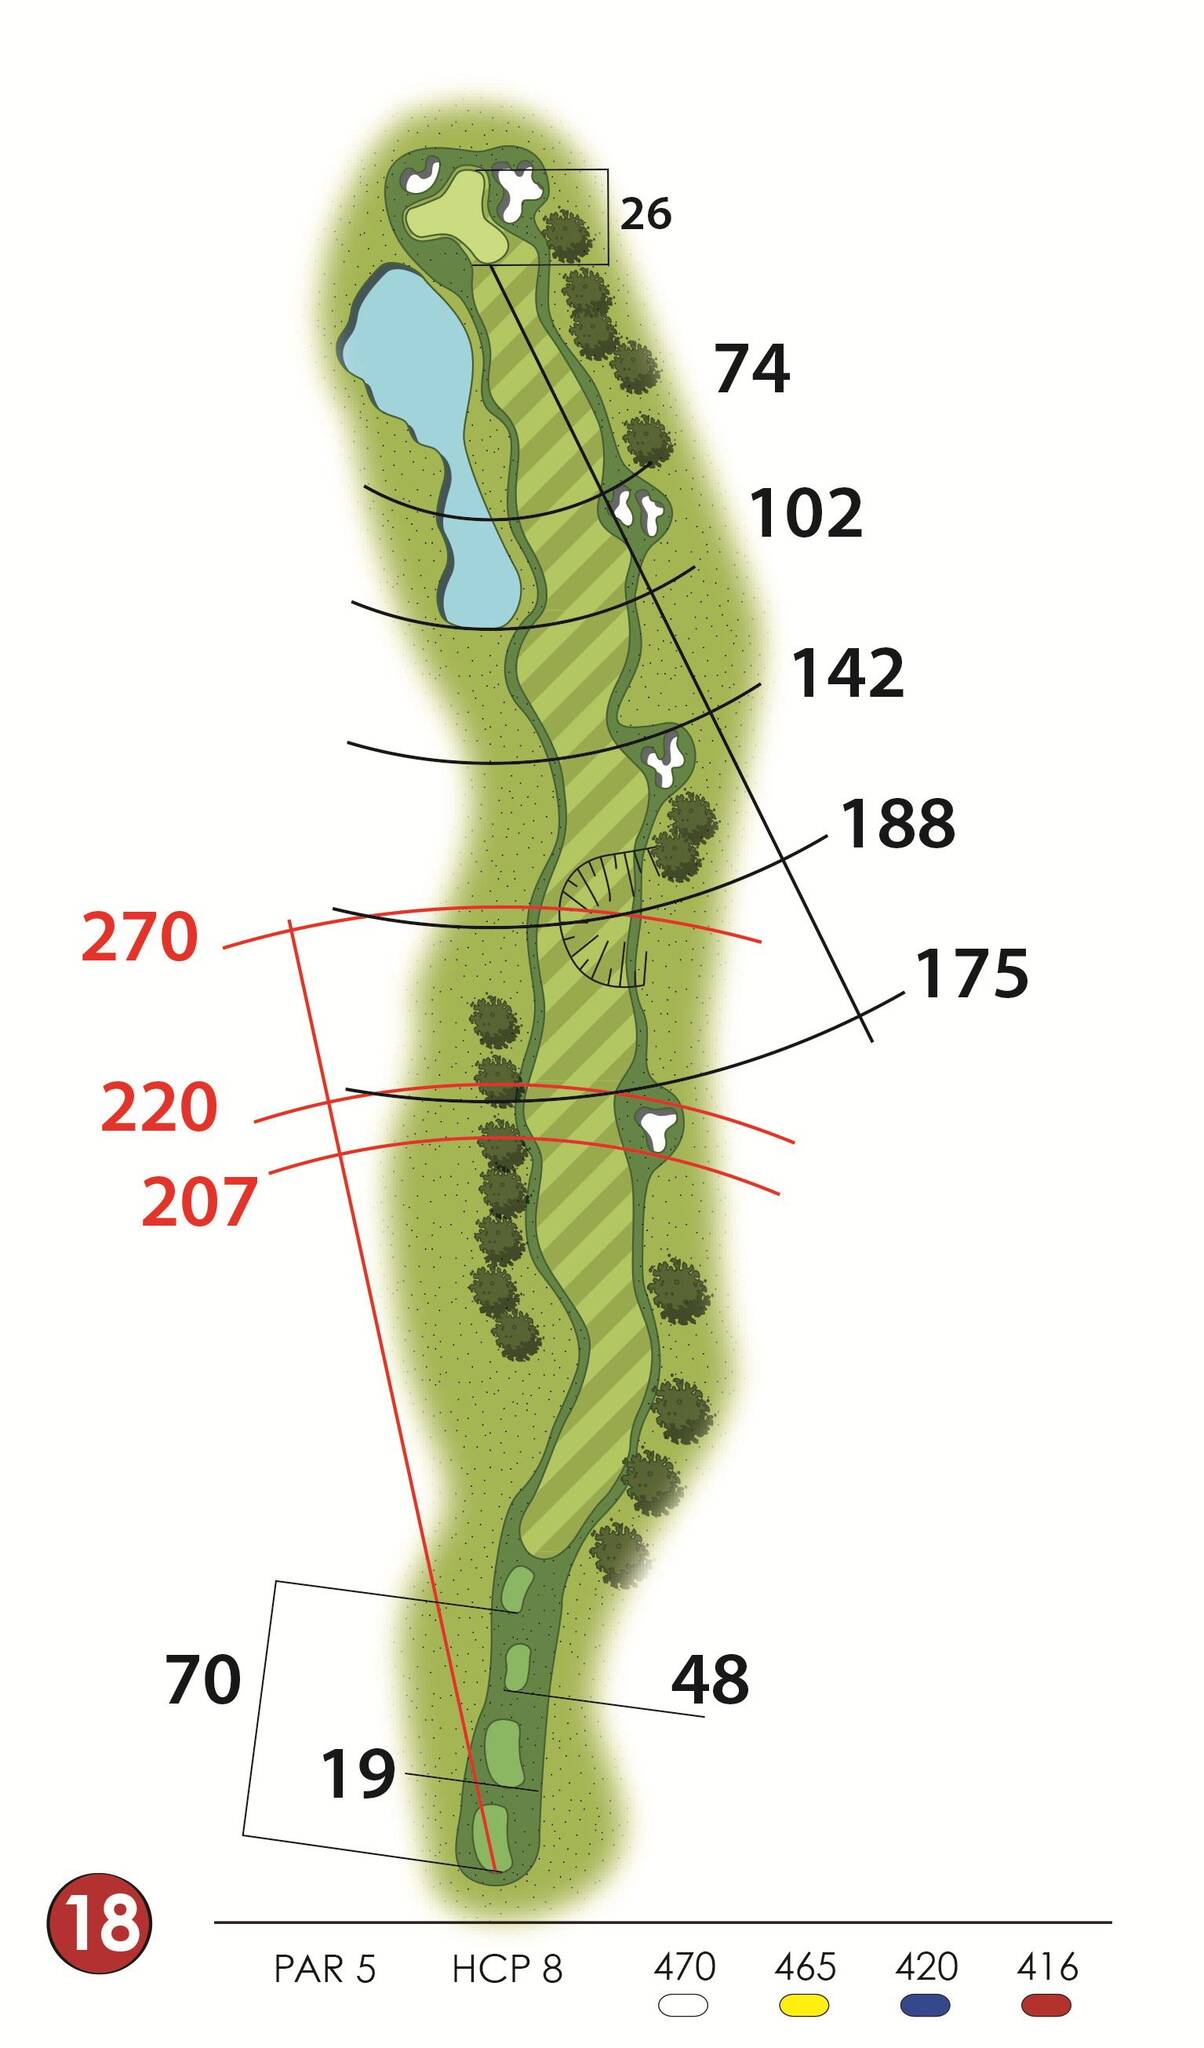
Hole 18
A final par 5 that can be reached in two shots for longer players. A rather penalizing bunker is located to the right at 210 meters, narrowing the landing zone for the first shot.
For the second shot, a lake on the left side starting about 100 meters from the green and bunkers on the right further narrow the landing area. You can either play a conservative mid-iron and leave a very short iron to the green (pitch/9-iron), or risk a wood to get as close as possible to the green.
Possible birdie with the flag on the right side, much more difficult if it is positioned to the left of this green, which is shaped like an inverted L but without particular slopes.